Quantcast
Channel: Curly Nikki
Viewing all 4836 articles
Browse latest View live

Hibiscus and Rooibos Anti-Itch Tea Rinse

$
0
0
(image source: google)

by Emilia Obiekea of Adorebotanicals.com

There are tons of hair teas and rinses out there to try. Hibiscus + Rooibos tea are one of my favorite combos. The red color is beautiful and the blend is beneficial.

Hibiscus comes in many different varieties. I tend to use the red hibiscus (easily available). It is great for slip because it releases a light amount of mucilage when used in hot infusions. This flower also aids in hair loss prevention, soothes the scalp, nourishes the hair, reduces frizz and leaves the hair with a healthy shine.

Rooibos Tea is a South African red tea. It is a great ingredient to incorporate in hair rinses for those that have dark or red hair (naturally or dyed). It is very calming to an irritated scalp, enriches hair color, stimulates the scalp, and contains a high amount of anti-oxidants and minerals such as copper.
This rinse can be used before or after deep conditioning.

Read On!>>>
Ingredients
  • 3 cups of distilled water
  • 2 tablespoons of rooibos tea 
  • 6-8 hibiscus flowers 
  • 1 teaspoon rosemary or 1 drop of rosemary essential oil 
  • 1 tablespoon of ACV (apple cider vinegar) 
  • 1 teaspoon of rose hips fruit
Steps
  • Warm the distilled water and pour it over all of the herbs and florals.
  • Cover and allow to steep until cool. 
  • Strain and discard the spent plant material. 
  • Add the ACV and *essential oil to the room temp infused water. Blend well. 
  • Pour it over the hair and massage the scalp well with the pads of your fingers. Be sure to have a bowl to catch the run off. 
  • Repeat the above setup several times. 
  • You can rinse it out with cool water or leave in on the hair and proceed to styling.
This is a very concentrated infusion for maximum benefit. If your hair is light in color, such as brown or blond, avoid using this tea as it may cause staining of your strands.  Give it a try and see how much you like it as well.

Enjoy!
Caution: Avoid getting the rinse into the eyes.

How I Get a Mean Braid Out in 7 Steps

$
0
0

Last week I posted pictures of my bad ass braid-out! After lots and lots of positive comments, I figured it’s time to share with you all how I manage to get these fantastic braid-outs time after time, fail-proof! Ok, so first, lets start with products that you’ll need.

Products needed:


1. A Moisturizing Leave In
Cantu Shea Butter Leave Conditioner, Giovanni Weightless Moisture Leave In, or Shea Moisture Shea Butter Leave In Conditioner) works best. If it’s a hell no for your hair if your were trying to keep it straight (ie: pressing) then it will work perfect for packing a moisturizing punch in your curly hair.

Read More!!>>>

2. An Oil to Seal With
Darcy’s Botanicals Juicy Peach Kernel Oil or Cherry Kernel Nectar Oil, will lock in the moisture from the leave-in. Oyin Burnt Sugar Pomade or a like product will work swimmingly as well!

3. A Comb and/or Some Fingers
These will be your only utensils for this braid out. If you’re a perfectionist, the comb will provide more precise parts. If you’re tender headed…or what my Jamaican mother calls “nasty” like me (lol), you’re fingers will be less of a discomfort on your scalp!

4. 5 "Ouchless" Hair Ties
To keep the hair separate while you work on sections.

Ok, so let’s get started!


1. Part your hair in four quarters. First, part down the middle of your head, so you’ll have two big halves. Secondly, part across, horizontally, so that you have two sections in each half part, four total in you entire head!

2. Catch up each section.

3. Apply Your Leave in Moisturizer to each of the four, separated sections. I find that combing the product through works best on my very very VERY thick hair. Be sure to pay attention to your roots AND your ends.

4. When all parts of your hair are amply moisturized, grab your oil of choice and rub it on your hands as though you are going to rub someone DOWN. Aaaaah yeah. LOL! Just kidding. Anyway, rub the oil on your hands and in between your fingers. Greasy hands make for even distribution when plaiting and twisting your hair.

5. Loose each of the four sections (one by one) and put four to five plaits in each section section.


6. Do step 4 as needed for each section.

7. When all sections are plaited up, slap on a satin bonnet.


P.S. It’s okay, if you have product or “hair boogers” showing when you finish. The satin bonnet will most likely absorb the excess product while you’re sleeping, without drying your hair out!

Tips for a Perfect Braid Out: 


  • Keep in mind that the condition of your hair should be clean. A co-wash is fine, but I find that my braid outs hold both definition and moisture when done on damp, clean, hair.
  • When you wake,ensure that your hair is completely dry. If not, be sure to blow dry on LOW heat until dry. If your hair is not completely dry, the frizz will be disastrous and the hold will be sucky.
  • When your hair is all the way dry, let it down and lightly mist with finishing spray (Juices and Berries if it’s humid where you live or an oil/water base conditioning spray if it’s cool).

Voila! The most awesome braid out ever!

Now mind you, I realize all of our hair is different and this method won’t work for everyone, but if your have very coarse, thirsty hair like me or can’t seem to achieve the definition or moisture you want, some of these tips may be helpful! Hope this helps and happy hair flipping Dolls!

What's the secret to your baddest Braid Outs?

This article was originally published in March 2012 and has been updated for grammar and clarity.

Your Natural Hair Questions Answered!

$
0
0
 Photo Courtesy of Craving Yellow


Natural hair care can be daunting for newbies. Although there's lots of information online on how to nurture our hair, it can be conflicting or confusing. As a blogger, I get asked a lot of questions on how to best care for type 4 hair. Our texture has the tightest curl of them all and so it may require extra care in order to prevent tangling and matting. Here are some responses to some of the questions I get asked the most:

Read On!>>>
What is the difference between shedding and breakage?
Shedding is a natural part of our hair's growth process. Shedding refers to the process by which hair that has reached the end of its growing cycle naturally falls from the scalp along with the root bulb attached. Breakage, contrastingly, is when our hair breaks along the hair shaft. It can be caused by dryness, weathering from exposure to the weather elements, and over manipulation during styling and maintenance. Factors that increase your shedding rate include styling methods that place stress on your hair follicles, hormone changes, illnesses, and genetics. If you're in doubt, always consult your doctor.

How can I prevent breakage during protective styling, particularly after wearing braids?
Firstly, ensure that your protective style is well installed. Braids that are too tight will cause breakage. Secondly, remember to maintain your regimen by keeping your roots moisturized regularly. Lastly, wear your protective styles for a reasonable amount of time. Leaving a protective style installed for more than 6-8 weeks, especially without a touch-up, can cause breakage, which is counterproductive.

Can re-twisting your hair every night lead to breakage?
This is a tricky one. Re-twisting your hair every night does help reduce tangling and keeps your hair stretched. At the very same time, it might mean that you are constantly manipulating your hair, which might weaken your strands and lead to breakage. I'd suggest wearing long-term protective styles such as two-strand twists that do not require too much daily styling. Keep up with your moisturizing regimen in order to strengthen your strands and prevent damage.

Do you trim your own hair? If so, how often? And do you do so on wet or dry hair?
I have my hair professionally trimmed once a year when I have my hair anniversary. This is done on flat-ironed hair. Throughout the year I trim dead ends as they arise, and I do this on dry hair.

Do you use black tea/coffee rinses? What about baking soda rinses?
I have used black tea/coffee rinses with much success. They are speculated to help prevent shedding after wash day. I've used baking soda once - it made my hair rock hard, so that was also the last time I used it. For deep cleansing, I'd just rather use a cleansing shampoo once every six or so weeks.

How do you deal with "hard hair"? Is there a way to soften "hard hair"?
Well natural hair definitely feels "hard" when compared to relaxed hair. What you are adjusting to is a texture change. There is no product, technique, or style that can alter this "hardness". Our curl pattern is naturally prone to tangles. Learning how to handle our hair's texture is all part of the fun. I've found that keeping my hair stretched by wearing it in two-strand twists, braids, or plaits is really helpful. Over time I have gained experience with styling. The same will be true for you!

Do you wrap your hair up at night?
I wear a satin scarf every single night without fail. If my hair is in two-strand twists, which it normally is, I'll simply pin the ends away and then throw on my satin scarf.

Do you field a lot of questions about your hair? If so, share below!

4 Tips for Transitioning to Natural Hair

$
0
0
by Michelle Thames of HappilyEverNatural

I transitioned from 2009-2011. I can say that transitioning was very hard for me. At the time, I had no idea how to do my hair at all. The two textures were like night and day, and I was frustrated with my tresses. While transitioning, I chose to visit my hair stylist every two weeks to have her take care of my hair simply because I didn’t know what to do with it. At that time I wore my hair mostly straight. I continued visit my stylist and she cut the relaxed ends little by little. I continued this until one day I just couldn’t take it anymore and I let her know that I was ready to cut the rest of my relaxed ends. I had become confident enough that my hair was at a length I could work with.

Here are a few tips to help you through your transition:

Read On!>>>
Make sure you are choosing the right styles for your hair
One of the biggest challenges for transitioners is which hairstyles to try. The best hairstyles to try are Twist and Curls, Braid and Curls and rod sets (flexi rod and perm rods)-- they help hide the two textures and are easy to manage. You should try to experiment with different styles that work best for you. There are a TON of YouTube videos on how to do your hair in just about every style you ever thought of.

Set realistic expectations

Don’t expect to have hair like CurlyNikki, MahagonyCurls, or that girl on YouTube . Your hair is yours and differs from those women. Take time to learn your hair and what it likes and doesn’t like. It will take time for your hair to achieve the length and looks you desire. It’s a trial and error process. You will have to play around with different styles in order to figure out what works for your hair. If you don’t have realistic expectations you will be upset every time.

Take your time with your tresses
Good hair care is the best hair care. Make sure that you are moisturizing and deep conditioning your tresses. Don’t be overly rough when detangling your hair. Try to finger detangle most of the time (if you can). Pay most attention to the invisible line where your natural hair and relaxed ends meet, because you can have major breakage at this point. Too much heat styling can be bad (just a FYI), but the damaged can be minimized if it’s done right.

Be Patient, BE PATIENT and Lastly BE PATIENT
I know that you are like, 'ugh my hair is so not growing', but actually it is. It can be very frustrating to try to deal with two different textures, but you can stick it out.  If you’re really serious about this process of transitioning, some patience will be required. Remember you can always cut the relaxed ends off when you are ready. My advice is to do it on your time. Don’t feel rushed or pressured if you are not ready to say goodbye to your ends. You can also wear your hair in protective styles to help you through your transition (like Marley Twists or Box Braids).

Remember that patience is key, whether you BC or decide to transition, you have to be patient. I know it’s hard, but you can do it. Don’t give up!

Happy Transitioning!

Beginner's Guide to Natural Hair

$
0
0
 
by Kanisha of BlackNaps.org

When I first went natural over 5 years ago, not nearly as much information about going natural was available as there is now. Most of what I learned was through trial and error—lots of error. Truth be told, if I could do it all ever again, I’d change a lot of what I did. There are definitely some basics to going and being natural that would have helped me back then.

Here are five basic things every new natural should know that will definitely help you avoid hardship down the road. If you’re a seasoned natural, share these tips with someone just starting out. Or, share some of your own in the comments!

Read On!>>>


1. Protective Styling is a method, not a way of life.
While protective styling (tucking your ends away in a style such as wigs, braids, twists, or buns to help retain length) can certainly be beneficial to natural hair, it can easily become harmful for a couple of reasons. For one, if you over-protective style, especially with extensions, your hair can become extremely dry, which could potentially worsen the state of your hair.

Secondly, if you protective style too often, you’ll never really get to know your hair because it’s always tucked away. So when you do choose to wear your hair in a natural style such as a wash and go or twist out, you won’t know what works for your hair and it might result in an epic fail. Your hair needs to “breathe” in between protective styles. And whenever you remove a style, you should always do a deep treatment to replenish the moisture your hair hasn’t been able to receive while put away.

2. Natural hair isn’t “one size fits all.”
I say this a lot because I even have to remind myself of this sometimes. Just because another natural’s hair looks or seems like yours, doesn’t mean your hair will respond the same as theirs to a certain style or product. Some naturals can get away with using heat and/or color often and without damage while others can cause heat damage with just one pass.

The key is to get to know your hair, what works best for your texture, and what’s going to be the most convenient method for your lifestyle, which can change overtime. Be open to tweaking your method and your products until you discover what your hair responds well to.

3. The health of your hair is your responsibility.
So do your research. I’m constantly researching and learning about natural hair- not just for the sake of writing about it, but because I want to know the best ways to keep my hair at its optimum health. If you engage in poor hair habits such as excessive heat styling/coloring, over-manipulation, or neglecting your hair by not moisturizing, properly detangling, and deep conditioning the hair, then you shouldn’t be surprised when you have to get it cut or find that it stays around the same length.

If your goal is to grow longer hair or even to just maintain healthy hair, it will require effort but it will also be well worth the effort when you achieve your hair goals. For me, the best part about going natural was learning that I could grow my hair longer and healthier than it had ever been when I was going to stylists regularly, all because I made the health of my hair my business and therefore starting treating it with extreme care.

4. A word on major hair decisions…
… such as a drastic cut or color job. Some will tell you, “go for it!” while others will say, “take some time and think about it first” but really, that completely depends on your personality. Many Type 4 naturals have colored their hair on a whim or even after having pondered the decision for some time and still regretted it. Others have been completely happy with their decision, even it means having to nurse their hair back to health later. And others find that their hair prospers after a major cut or remains healthy after coloring.

Whatever you do, always take a page from tip #3 and do your research. Know what you’re getting yourself into and find a stylist who comes highly recommended. You may not know how you’ll feel about it 6 months or a year later but you can an idea because you know yourself better than anyone.

Another thing to consider: what are your hair goals right now? If it’s health and length, will this major hair decision help or hinder that? If you just want to have some fun with your hair, is something permanent the answer? Ask yourself first.

5. Enjoy your hair!
It really is just hair, after all, so don’t get so lost in all the do’s and don’ts that you end up disliking your hair. Your hair benefits most from you giving it TLC. Don’t be afraid to try new things and enjoy the journey!

Share your tips for beginners below!

Jade Is Naturally Glam!
$
0
0

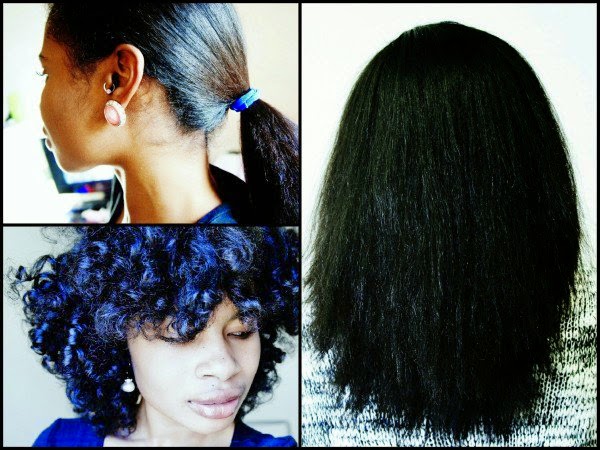
Hi! My name is Fabulous Jade! I was a transitioner for sure! I wore braids a lot! One day in the summer of 2010 I was so over braids. I decided to wear my natural hair and that was the best decision I ever made.

Had you always embraced your texture?
 I actually have always embraced my texture. I decided early in this journey there was only one me. And that concept has helped me love myself as a whole.


READ MORE>>
How did family and friends react to your decision to go natural?
 My grandmother, mother, and sister were all natural before I started my journey, so I had a lot of support and no insecurities about my decision.

Describe your hair (fine or coarse, thin or thick, highly porous, low, etc.)
 My hair is coarse, curly, and thick.

What’s the craziest thing you’ve ever done to your hair?
 I dyed my hair CRAYON RED! I really thought it was dope at the time. But hey, it's just hair!!!

What’s your biggest hair related regret? 
I don't trim nearly enough!

What's your current hair routine?
I wash my hair twice a month. I condition my hair with coconut oil and olive oil together daily. Most times I just put it on right after I shower while my hair is a little damp. As far as products, besides the two above, I really enjoy blue magic leave in conditioner, and if I am not using SheaMoisture, I use Taliah Waajid  products.

What’s your favorite hairstyle? Where do you get hairstyle inspiration?
 My favorite hairstyle is a twist out for sure! I get my hairstyle inspiration from my mood and however my curl pattern wants to act that day!

Who is your curl crush?
OMG!!!! Tracee Ellis Ross is my curl crush. I just love her JOAN hair!

How do you maintain your hair at night?
 I usually part it in fours, plat the sections, put on a silk bonnet, and go!

How do you maintain healthy length?
I don't use much heat at all. I also found protective styles help as well.

What's the best thing about being natural?
The best thing is showing the world MY TRUE BEAUTY!

Where can folks find you on the web?
You can find me on Facebook @fabulousjade

How to Flat Iron Natural Hair for Silky Results

$
0
0

She'kia Renea is back, and with the weather getting all chilly and lacking humidity, she's showing us how to wash, blowout, and flat iron your natural hair.  Enjoy!

Watch Now!>>>


It's Not Impossible...Here's How to Detangle the Worst Knots

$
0
0
 
by Samantha Berley via NaturallyCurly

Sometimes something as simple as skipping a wash can knot up your hair like ropes on a sail. It’s not the greatest situation, especially if you want that healthy sheen. Knots can drag you down, but there are plenty of ways to defeat these hairy foes. With a little patience and a bit of time, detagling those nasty hair knots is as easy as ABC.

Read More!!>>>

Preventing Knots with ABC
  • APPLY conditioner and lots of it to de-knot. There are directions on the back of every conditioner bottle, but the longer your hair, the more you need. Work the conditioner from root to tip, making sure it’s evenly coated. If your hair is particularly curly or coily, try leaving it on for an extra couple of minutes.
  • Detangle BEFORE you get into the shower. This little trick of the trade makes it easier to work through both a shampoo and a conditioner. What’s more, you can find the small knots beforehand so you’ll spend less time de-knotting your hair in the shower by working on any problem spots.
  • COMB thoroughly. Once you’re out of the shower, apply a leave-in conditioner or whatever product you prefer and use a medium or wide tooth comb. Spend time working your way through your hair while it’s still wet, again working on possible problem spots that may appear.
There are plenty of other options to prevent knots. Placing hair in braids or a silk scarf before bed will prevent friction and tangles. You can also use detangling in-shower products and conditioning treatments. If you’re taking all precautions, you should succeed in preventing bad tangles.


Detangling

That being said, sometimes all the preventative measures in the world won’t stop knots from forming. It’s a sad truth, but in this case there’s no time for tears. Literally, the longer you wait, the worse a knot gets. The sooner you untangle the beast, the better. Here are some steps to help you in the battle against knots.
  1. Find the tangle or tangles. Work your fingers through your hair, pinpointing the problem area.
  2. Hold the knot in question with one hand. You should get a feel for the knot to better de-knot, and if possible, what it looks like. The more you know about how it’s knotted and where, the better chance of success with your hair.
  3. Comb your fingers through the knot as much as possible while holding the knot. If you can loosen hair from it, try to pull it out of the knot without breaking the strands of hair.
Tip: If you cannot loosen the knot whatsoever or the knot is fairly large, wet your hair before proceeding to step 4.
  1. Apply hair conditioner, hand lotion, warm olive oil, or a special detangler product to de-knot. All have been proven to work towards detangling anything from a minor snarl to a massive rats nest.
  2. Finger comb the product through your hair and let the conditioning item sit for a few minutes.
  3. Gently comb your hair with a medium or wide tooth comb. Avoid pulling your hair and roughly working the comb through your hair. This can lead to breakage and more knots in the future.

The Worst Knots

If it seems not even the best TLC is cutting it, you may have to cut that knot out of your life. But don’t de-knot it yourself, especially if it’s is toward the back of your head. Sometimes the knot is so severe that it’s time to take a trip to the hair salon. A stylist should have the professional know-how to cure whatever hair disaster ails you. And if there is no cure, they have the talent to create the perfect, albeit somewhat shorter style just for you.

Do you have any secrets for staying virtually knot-free or getting the knots out of your curls?


CN Says: 
I do a little pre-shower finger detangling using coconut oil before hopping in the shower to do the real work. Once in the shower I wet my hair and then smoosh in ALL the conditioner. All. The. Conditioner. Like half a bottle (just kidding, so serious). I run my head back under the water stream to help activate the slip. I then let it marinate while I shower. Finally, I gently finger detangle under the shower stream with my fingers and follow up with my bass wooden brush for any trouble spots. Your 10 digits, a super slippery conditioner (Aussie moist) and a powerful shower stream is the key to a successful detangling session.

This article was originally published in June 2012 and has been updated for grammar and clarity.

“I Had To Do It”: Maria Borges Rocks Her Natural Hair At The Victoria's Secret Fashion Show

$
0
0

 
PHOTO COURTESY OF EVAN AGOSTINI


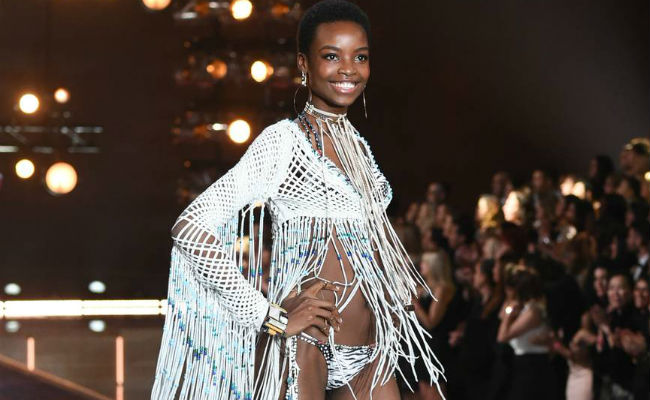
Model Maria Borges is no stranger to the Victoria's Secret Fashion Show. And third time's a charm.
Having walked in the acclaimed show both in 2013 and 2014, everyone couldn't help but notice something strikingly different about Borges' appearance. This year, the 23-year-old Angolan beauty chose to rock her natural hair TWA rather than conceal it with a wig like she did in her prior Victoria's Secret shows.

Maria's presence during the event was effortlessly confident; her beautiful facial features and amazing physique statuesquely glided down the runway in the most graceful way. But according to celebrity news blogger B. Scott, Borges wasn't so sure of herself before the show actually happened. "I told my agent I wanted to walk in the Victoria's Secret Fashion Show," the model stated. "I was nervous, but I had to do it." Last night a wig-free Borges caught all of us off guard.
Read On!>>>
It's no secret...

With much publicized news like newcomer models like Kendall Jenner and Gigi Hadid joining the squad of "Angels", something like this was easily overlooked until it was time for the public to speak. But no one could take their eyes off of the fearlessness Maria Borges showed off the entire time. As it pertains to the fashion world, Victoria's Secret theme has had its fair share of blame for constantly forcing a one-size-fits-all standard of beauty onto women: sun-kissed beige skin, with an emphasis on big breasts and a thin frame. Aside from having a naturally slender figure, Borges represents many of the neglected equally beautiful physical features that especially go unnoticed during, of all things, a Victoria's Secret Fashion Show.

Mic.com writer Rachel Lubitz says, "In the fashion and beauty industry, there's been a rise in models themselves drawing attention to the industry's overall lack of diversity, in particular its consistent overlooking of black beauty."

"Africa, this one's for you!" an excited and proud Borges said on her Instagram, followed by the hashtag #MBMakingHistory. Whoever didn't know the name Maria Borges before yesterday, has taken notice today, for sure. The model has been trending across social media platforms, and for good reason. Maria, we salute you for displaying such grace and bravery in embracing your natural hair during the 2015 Victoria's Secret Fashion Show. 

DIY: Citrus and Chamomile Soapnut Shampoo

$
0
0

image source: google

by Emilia Obiekea of Adorebotanicals.com

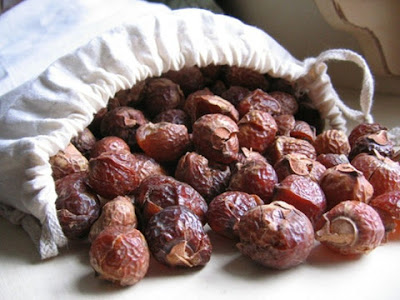
Soap nuts are a great cleansing fruit. The fruit pulp creates suds that result in gentle, effective cleansing, body and shine!  This is a great cleansing recipe for those with skin sensitivity and scalp issues such as psoriasis, dermatitis and eczema. Check it out!

Read On!>>>

Supplies
Mesh strainer
-A pot
-1 muslin bag
-1 dye applicator bottle
-1-2 ice trays

Ingredients
-6 seedless soap nuts
-4 cups of distilled water
-1 peel of a whole lemon or lime
-1 tablespoon of horsetail
-2 tablespoons of chamomile
-1 tablespoon of coconut nectar *great vegan humectant

Steps

-Add the following to a muslin bag: soap nuts, citrus fruit peel, chamomile, horsetail
-Put the bag in a pot of distilled water. Bring it to a boil.
-Reduce the heat and let it simmer for approx 30 minutes. *Do not cover. It can boil over due to bubbles.
-Turn off heat, let it cool and strain well.
-Stir in coconut nectar and it's ready for use.

Use

-Pour 2-4 oz into a dye applicator bottle.
-Apply directly to scalp. Massage well for a few minutes. Rinse well.
-Follow up with a rinse out conditioner and the rest of your regimen.

Store for next time

-Pour the remaining sudsy infused water in an ice cube tray.
-Freeze and store in freezer bags.
-When ready to cleanse your hair just get a few cubes out, let them thaw and use as normal.

Give it a try and share your experience in the comment section.
Enjoy!

Disclaimer: I am not a doctor. Be sure you do not have an allergy to any of the ingredients. It is always suggested to do a test patch prior to full use of any new product. If you have questions or concerns consult a physician.

SHOW AND TELL- FIERCE FRIDAY!

$
0
0
Hola Chicas!
Fierce Friday is a way to celebrate our natural hair, displaying our dopest styles and best hair days... for inspiration and motivation. Wanna be featured? All you have to do is upload your favorite pics to Instagram with the tags #FierceFriday and #CurlyNikki. Be sure to share a brief description of the style, where you were headed, why you felt amazing, etc.!
Throw 🔙 Thursday "Pinned Up Twist" I did this style last December and I cannot get it to look as good as the first time. But why⁉️It was so perfect🙍🏽GOSH!! I'll be trying out this style again really soon. Hopefully it comes out as perfect as before. @butter_curls


#FierceFriday#CurlyNikki I'm headed out to a party with a fresh cut and a wash n go Mohawk. I'm so happy to see what tonight brings! @natrallybrown


Simply Vamp lippie x Messy puff = Wednesday💋 | SB- My #mielleorganics products always come through on bad hair days. I swear by them!!! @posh_syd

Cooperative curls are a rare blessing ➰ @xo_rashielle


🚫 Relaxer. #norelaxerhoodie @curlswithlove

6 Super Easy Styles if You Can't Braid or Twist

$
0
0

by Jonna of Blacknaps.org

Even though I feel like ‘all my life I had to braid and twist’, I know there are many people that do not know how to. Or maybe you do but you feel you aren’t that good at it. In the sea of tutorials and style ideas out there, so many of them are based on braids and twists. But don’t get discouraged! There are several styles that don’t require them. Here are a few that I love to wear:

Read On!>>>
Styles if You Can't Braid or Twist

The Puff
THE #1 hair style in the natural hair community is hands-down the Puff. This style can be done on short or long hair, and only requires one thing – a ponytail holder or you could also try a puff cuff. Laid edges are optional.


The Roll, Tuck & Pin
For those days you want to tuck your hair away, or have a major styling fail, this is the go-to style. You can do this tons of different ways, and again, it another style that can be done on various hair lengths. It’s one of those styles that looks like it took a lot of time, but totally doesn’t.


The Wash n Go
Contrary to popular belief, any hair texture or curl pattern can achieve curl definition styles, better known as the wash n go. It can be done on any length of hair, and there are tons of products and techniques you can use. The trick is finding what works for you and your curls. See which products we recommend for wash n go’s here.


The Bun
 The bun is one of my favorites, and it’s done very much like the puff. The bun has a more sleek look because it has some structure. You will need more length to create a bun than you do to create the puff. If you don’t have length you can always use marley hair for fullness or use a hair donut. This style is easy and all-purpose: you can wear a high bun, a low bun or even and side bun.


The Faux-Hawk
For a fun and funky style, the faux-hawk is another style that looks way more complicated than it is. I like to do mini-puffs or mini-buns and merge them together to create the hawk look. Or you can use bobby pins to hold your hair down on the sides, fluff the middle and boom. Party ready!


Elastic Cornrows
Don’t know how to cornrow? With this hair hack you can easily create the illusion of cornrows, with no knowledge of braiding at all!


Did we forget any other options? For those who cannot braid or twist, what are your go to styles?

Vitamin D for Healthy Hair Growth

$
0
0
 

Throughout their journey, many naturalistas will board the "hair growth challenges" bandwagon. By hair growth challenges, I’m referring to three month long challenges that involve pills, pills, and more pills. They stock up on items like Hairfinity, The Mane Choice, or the generic Biotin complex brand. They believe biotin will be the answer to their hair growth problems. They may not realize, however, the role the common vitamin D plays in the process of strong hair growth and retention.

Read On!>>>


How Do We Get Vitamin D In Our Body?
Remember when your parents told you to go outside because it was good for your body? Even though you may not have comprehended it at the time, the sun exposure helped your body produce vitamin D.

Besides sunbathing to obtain the amount of vitamin D our bodies need, some alternatives to receiving your daily dose are eating fatty fish like tuna, sardines, or whole eggs for the non-fish eaters.

Vitamin D Deficiency and Hair Loss
Many people understand that vitamin D is good for your skin; we also know that a healthy scalp is only one component to healthy hair. The scalp is another section of body skin, which makes vitamin D also good for the scalp. A 2010 study in the Dermatology Online Journal established that cases regarding hair loss had low vitamin D levels which disturbed the hair follicle growth cycles.

According to Dr. John Cannell, MD, having a vitamin D deficiency causes the hair follicles to become dormant, thus creating a weak basis for healthy growth. Eventually, this leads to hair loss.

A 2012 Harvard Public School of Health study suggested that vitamin D can create new hair follicles. Researchers found that vitamin D can stimulate the dormant hair follicles, leading to restoration of hair growth. Follicles that are dormant for too long begin to release the hair which results in patterned balding. It is important to keep in mind that even though if follicles are awaken hair may not grow which could mean other issues.

Hair Loss Treatment Results
Though there aren't 100% guarantees of hair loss recovery, there are steps that can be taken to get on the right path.  Some of the more common, attainable solutions are Rogaine and Propecia. A study published on Progressive Health says that patients in remission from chemotherapy were a part of a study in which they used topical gel with vitamin D which yielded positive results. The biggest contribution anyone can make to increase their vitamin D levels is creating a balanced diet and going outside on a sunny day.

The Takeaway
If you're suffering from hair loss due to a vitamin D deficiency it's fine to work toward increasing those levels BUT be aware of the amount of your body takes in to avoid serious health complications.

Is Dandruff Causing Your Dry, Flaky Scalp? #OrNah

$
0
0


by Audrey Sivasothy of The Science of Black Hair

Think it’s Dandruff? Think Again!

Everyone has had to deal with dandruff at one point or another. And let’s face it, those flakes are just never welcome! For most of us, a quick washing with Head and Shoulders, Nizoral, Selsun Blue, or some tea-tree inspired something is enough to clear up most flake flare ups— but sometimes dandruff can be, well . . . not really dandruff. If you’ve used every dandruff treatment in the book and still can’t seem to beat the flakes, it might be that you are really fighting something other than dandruff.

How do you know if your dandruff is just dandruff, a false alarm, or a real symptom of something else entirely?

Read On>>>
The Real Deal
Before we talk about the dandruff false alarms— let’s talk about real dandruff. Sometimes dandruff really is dandruff. Real dandruff is believed to be caused by excessive growth of a fungus called malasezzia. Malesezzia is naturally found on the scalp in non-dandruff sufferers, but the fungal population is out of control in those who are plagued with dandruff. Experts are not quite sure why malassezia multiplies on the scalp, but many attribute its growth to having excessive amounts of oil on the scalp from infrequent cleansing, having a compromised immune system, poor diet, or simple hormonal changes in the body. In most cases, a standard shampoo regimen will clear up dandruff in a few weeks. Common shampoo active ingredients include zinc pyrithione, ketoconazole, selenium sulfide, coal tar, tea tree and other tingly active ingredients. For stubborn cases, the active ingredient in the shampoo may need to be rotated for best results (for example, using zinc pyrithione shampoo during weeks 1 and 2, and a selenium sulfide-based shampoo in weeks 3 and 4).

The False Alarms:


Dry Scalp
One commonly mistaken dandruff lookalike is plain old dry scalp. Some products have a knack for drying out the scalp— shampoos are a common culprit. Regularly using a soap or shampoo formula that is too harsh (usually sulfate-based) will lead to scalp dryness over time. Other dry scalp instigators include weather changes, using water with a high mineral content or pH, and using water that is too hot. Those who chemically treat their hair with relaxers, texturizers, or hair coloring products and those who overdry their hair when blowdrying may also run into this kind of problem as those treatments/techniques tend to dehydrate the scalp. If you aren’t hydrating your body from within by drinking water, you’ll also tend to have dry skin— not just on the scalp— but all over. Proper diet is also key to maintaining the skin— and essential fatty acid and Vitamin C deficiencies are common triggers of dry, itchy scalp You can add more fish, citrus fruit, nuts and leafy green veggies to your diet to work around this, but know that it can take three months of good nutrition or more before the results improve.

Product Buildup
Product buildup and less than thorough rinsing can also lead to dandruffy looking conditions! Conditioner is the number one culprit here, and in kinky-curly hair (or relaxed hair with considerable new growth) conditioner can become “trapped” near the roots upon rinsing. If efforts aren’t taken to gently agitate or free conditioner that has settled close to the scalp, you will be in for an itchy, flaky mess once the hair dries. In my experience, this type of buildup is also oilier and gummier— like a gross, icky blanket on the scalp. Gels, serums and oils can also create sticky films that combine with sebum and regular debris to produce what looks like flaky, dandruffy scalp conditions.

Psoriasis and Seborrheic Dermatitis
Sometimes real dandruff can be a symptom of some other scalp condition— and making a distinction between plain dandruff, psoriasis and seborrheic dermatitis can be tricky. What really helps distinguish the conditions from one another is the degree and kind of flaking you tend to get. In psoriasis and seborrhea, dandruff is usually the main symptom among other symptoms like redness and crusting, for example. Psoriasis tends to produce thicker, drier looking scales of skin than seborrhea does— and it also tends to appear on other parts of the body (knees/elbows). Seborrhea tends to produce an oilier kind of flake. Fortunately, treatments specifically targeted for basic fungal dandruff can help clear up outbreaks of psoriasis and seborrheic dermatitis. A quick visit to the dermatologist will help you figure out if your dandruff is just dandruff, a false alarm, or if you’ve got a dandruff as a symptom of something else.

Do you deal with dandruff? How about any of the false alarms?!

Kenya Is Naturally Glam!

$
0
0

Were you a transitioner or a Big Chopper? What was your journey like?
I transitioned without even knowing it.  I wore weaves forever, and had my last relaxer in 2006. But I wasn't taking proper care of my hair, so while I wore weaves all the time I never deep conditioned. I washed my hair only when I removed my weave which was once every month. Sometimes every 2 months.

READ MORE>>
In 2012 my husband encouraged me to stop wearing weaves but I kept wearing them until I found out about the natural hair community on YouTube.  From YouTube I heard about Henna and when I googled henna, CurlyNikki came up with loads of information on how to care for natural hair. I mean everything you need to know is on there. I haven't had a weave since December of 2013, and my hair is healthier and longer than it's ever been.  Last time I used heat was May of 2014.


Had you always embraced your texture?
I did not embrace my texture at all. I was always tempted to relax my hair. I used heat all the time like every day because of the need to straighten my new growth so it would match the texture of my weave. This caused me some heat damage in the front area of my hair where I would have my leave out when I wore weaves so I am still transitioning from heat damage in that area.

Describe your hair (fine or coarse, thin or thick, highly porous, low, etc.)
Being natural and having at least 4 different textures makes my hair more challenging to deal with.  I have mostly 4a and 4b with a patch of 4c on the left side and a patch of 3c in the lower back section of my head.  My hair has a combination of low and high porosity areas.

How did family and friends react to your decision to go natural? What was your response to them? 
My family was pretty accepting and actually encouraged me in my returning natural hair journey.  I have 2 daughters, 14 and 16, who have never been relaxed, so now we’re on this healthy hair growth journey together and boy do we ever go through some products! Lol

What’s the craziest thing you’ve ever done to your hair?
The craziest thing I ever did to my hair was color it honey blonde then highlight it with platinum blonde….. Let's just say I had to end up cutting my hair.  This happened a few years ago before I had my last relaxer.  The only color I have now is from henna treatments which is a deep red/burgundy.

What's your current hair routine? How often do you wash, condition, and style? Favorite products! Deets!
I wash my hair with shampoo once a month with carols daughter monoi shampoo.  I co-wash once a week with Aussie moist conditioner, then I follow with a leave in (Camille rose moisture milk).  I let my hair dry about 80% before doing a twist out or braid out using Camille rose twisting butter.  I deep condition every time I wash and I have so many different ones and I love them all!!! The most recent one I tried was Shea Moisture 10 in one renewal, love it!

What’s your favorite hairstyle? Where do you get hairstyle inspiration?
My favorite hairstyle is a twist out.  I get hairstyle inspiration from every natural I see lol.  I’m always trying to take a little something from natural hair pictures I see on Pinterest and Instagram and put my own twist on it.

Who is your curl crush?
My curl crush is India from MyNaturalHairSisters and also Naptural85.

How do you maintain your hair at night?
I re-twist my hair at night using a bit of leave in with some oil then wearing a bonnet or scarf over it, or sometimes it’s just my satin pillowcase.

How do you maintain healthy length?
I trim my ends every 2-3 months and always make sure they are extra moisturized and sealed because my hair can get super dry especially in the fall and winter months here in Canada.

What's the best thing about being natural?
The best thing about being natural is having sooooo much versatility.  I can still straighten my hair, I can wear blow-outs, weaves and wigs.  But at the end of the day I still have the beautiful healthy virgin hair I was born with that I can style in its natural state, My Favorite!!!

Where can folks find you on the web?
You can find me on Instagram: kienyabooker and FaceBook: Kienya Booker


Dish Soap to Clarify Natural Hair?

$
0
0


by Jascmeen ofJascmeen.com
 
“WASH YOUR HAIR WITH PALMOLIVE,” THEY SAID. “IT’LL BE GREAT,” THEY SAID.

This weekend I got a glimpse into the world of luxury salon extensions. I was on assignment for Racked, covering the Mane Addicts Mane University class founded by Kim Kardashian’s stylist, Jen Atkin. Mane University showcases Jen’s stylist buddies based on their expertise, and this time around it was all about extensions.

I’m no stranger to extensions although I’ve recently given them up in favor of wigs. It’s just easier for me to remove them and treat my scalp and ends nightly. I honestly spent most of the class staring at Chrissy Teigen, people watching, and jotting down the occasional tip that the everyday woman can appreciate.

One nugget of wisdom came from celebrity extensionist Priscilla Valles. She removes tape extensions with citrus oil and needs a powerful clarifier to get rid of the residue. Her product of choice? Palmolive. Yeah, the dish soap. “Nothing suds like Palmolive!” she stated. “It’s the best clarifier in the world, really.” Hold on. Best in the world? I want some “best in the world!”

Read On!>>>


There are some obvious problems with this. Palmolive is not sulfate-free and I was worried that it would be super harsh on my already dry hair. I didn’t have any crazy buildup. I didn’t even need such a powerful cleanser like Priscilla’s clients, so why was I even doing this? Eh, curiosity I guess.

I prepoo’d with coconut oil and got to work. Turns out it’s amaaaaazing suds-wise. Comparable to ORS Olive Oil Creamy Aloe Shampoo, I would say. I used a few drops and had suds for days. Did it dry out my hair? Nah, it felt pretty normal. But I did get a minuscule drop in my eye and was nearly blinded. Was it squeaky clean? Like, the cleanest hair of my life? Actually no. My Dr. Bronner’s Peppermint Pure Castille Liquid Soap? Now that’s a squeaky clean.

Will I be using Palmolive again? Probably not. Part of it is because of the temporary blindness I endured and part of it is because I just really love my Dr. Bronners right now. I will try using it on my wigs since it did get the job done. For now I’ll stick to my lovely peppermint and leave the Palmolive under the sink. :)

If you’ve ever used dish soap on your hair, extensions, or wigs, what was the result? Is Dawn better? Tide? OXY Clean? 409? Windex? Lol

3 Alternative Ways to Color Your Natural Hair

$
0
0


When many of us grow bored of our natural hair, we tend to either, a.) pick up the scissors, or b.) go for a fresh look with a pop of color. Whether you're just adding highlights, going for the ombre effect, or diving in head first with all over color; you have to be sure to research and take the proper precautions.

Read More!!>>>

Before You Color:


DIY or Salon? If you are comfortable enough doing your own hair (and low on cash), it is perfectly acceptable for you to do your own dye job at home. You can pick up a box of dye almost anywhere, local drugstore, beauty supply store, even the grocery store. If you are going to attempt this yourself, research proper application and be 100% sure on your color choice. If you're unsure about a DIY job, go to a professional and they can help with application as well as color selection.

For Healthier Options, Try These Alternatives:


Hair Color Rinse
If you are nervous about color, it may be best to try a hair color rinse first, rather than permanent color. A rinse will still give you the chance to try a new color, but without the permanent commitment. Most hair color rinses only last 6-8 shampoos because it only stains the outer layer of hair versus penetrating the shaft and depositing hair color like a permanent dye. Although a rinse gives you a temporary change, remember that it cannot lighten your hair, so only consider this option if the color you want is deeper than the color you already have.

DIY Cayenne Honey Color

Consider Natural Coloring…
Henna, nutmeg, tomato, hibiscus, honey, etc. While many of these natural hair coloring techniques have not really been studied, many have tried them with success. Many work over time, after multiple applications and you generally don’t see a color change immediately. Also most of these can only give you a brown-reddish tint/color, except honey which has been shown to lighten the hair in some individuals who have tried it.


Funky for a day? Take a cue from our very own natural hair guru, CurlyNikki and use eye shadow to give yourself some funky highlights! I have tried this myself and it works great and gives you just enough pizzazz and sass! If you are trying this, cream and liquid shadow provides a deeper color and lasts longer than powder. And when you are done painting the town red, blue, orange, or green, simply use a little shampoo and it’s gone!

After Your Color Treatment:


Moisture, moisture, moisture- After you have colored your hair, you may experience some dryness. So, it is imperative that you pay extra close attention to your moisture levels and give your hair lots of TLC. It would be helpful to deep condition at least once a week and use extra oils, butters, and creams to keep your hair soft and moisturized.

Whether you are a first timer or an old pro, you still need to be careful when using hair dye. Although it’s not as serious as a relaxer, it’s still a chemical and can cause major damage if done improperly. Research, arm yourself with knowledge, take precautions, and happy coloring!

Do you dye your hair? What's your process? How do you maintain the health of your hair?

This article was originally published on December 2012 and has been updated for grammar and clarity. 

5 Reasons to Continue Your Natural Hair Journey #KeepOnKeepingOn

$
0
0

 
by Michelle Thames of HappilyEverNatural.com

Have you reached a point where you are ready to give up on your natural hair journey? Has it been more of a struggle than a journey? Are you frustrated that your hair is not growing at the rate that you expected? Are you upset that your twist-out is a fail? I totally understand your frustration, but stop right there ladies! I am here to tell you that you can do it! Here are some reasons why!

Read On!>>>


  1. Versatility– Having natural hair lends so much versatility!  One day you can rock a protective style, the next day a twist out and the next, a wash and go. There will never be a dull moment, trust me.  You can switch it up and have fun (the most important part of this is to have fun!!).
  2. Freedom– You don’t have to worry about sweating your relaxer out because you went to a party and your favorite song came on! Fear no more! You can go to the gym and workout. You can walk outside and not be afraid of the rain. You will not melt! “I’m Melting… I’m Melting…..
  3. Hair Growth– The number one question I get asked all the time is how did you grow your hair so long. My honest answer is that I quit my relaxer. Yep, I quit her, she had me all messed up. No but really, I took better care of my hair and it flourished.  Patience. Persistence.  Love.
  4. Your Natural hair is beautiful. No hair typing needed, it’s simply beautiful the way it grows out of your scalp. Embrace it.
  5. You will make new Curlfriends. “No new friends” well not over here! I have made so many new curlfriends since I went natural and they are all amazing. You will make new friends that will help you better your twist-out, perfect your rod set, or let you have that one product that didn’t work for them that you have been dying to try (money-saving 101!)
All jokes aside, you can do it! You got this!
 
Share your advice for those that need to #KeepOnKeepingOn

How to Stretch Natural Hair Without Using Direct Heat

$
0
0

by Kanisha Parks of BlackNaps.org

Stretching natural hair has a variety of benefits: it prepares the hair for other styles, allows you to see your length, and can make for an easier detangling session. One of the quickest and most common ways to stretch hair is by simply blow drying all of your hair, but there are many ways to stretch your hair without resorting to this. Here are a few techniques that can be done on wet or dry hair to get your hair stretched out naturally and easily:

Read On!>>>
1. Buns:
Simply divide your hair into two sections, twist your hair in on itself, and bun it up. Secure with a ponytail holder.

2. Banding:
To band your hair, section it off and wrap a ponytail holder around the first section. Continue to place ponytail holders down the hair shaft, spacing them out a bit in order to let the hair “breathe.” Doing this elongates your hair and will result in a bomb faux blowout!

3. Pineapple:
Flip your hair up into a high ponytail and secure with a clip or ponytail holder. Doing this stretches out the roots of your hair and is great to do overnight.

4. Set, then separate:
Install a style that will stretch your hair such as braids, twists, flexi rods, curlformers, or rollers in your hair. For braids/twists, the amount will depend on your length but typically, anywhere from 2-8 braids is sufficient. If you have tightly curled hair, braids will produce a better stretch than twists will. If you choose to install a roller of some sort and want maximum stretch, wrap your hair after taking them down and wear a scarf overnight.

5. Blow dry your roots:
Make sure to do this on a cool setting. Simply pull a section of hair taut and blow dry your roots, using the nozzle end on your blowdryer. This will provide instant stretch if you’re pressed for time. This is called the tension method.

How do you stretch your hair?

7 Super Easy Styles on Stretched Natural Hair

$
0
0

Check out Zara's seven super-easy styles on stretched hair.  She says, 'it's perfect for my type four hair and perfect on other textures as well!'  I'll be keeping my fine strands stretched all winter, so I'll definitely be putting her tips to use!

Watch Now!>>>


Viewing all 4836 articles
Browse latest View live


Latest Images