Quantcast
Channel: Curly Nikki
Viewing all 4836 articles
Browse latest View live

Why I Don't Set Goals or Care About Them At All

$
0
0
 

I smile to myself when clients ask me about goal-setting.  I'm not the one for that.  At all. I'm the free-spirited coach who will tell you to write your feelings and get to know them instead of focusing on goals. I  don't pretend to care about goals because they are not what drives me. When I realized this about myself, my mind completely opened up and I became more creative, more productive and definitely happier.


Read On!>>>


I've been taught my whole life to set goals.  Measurable goals.  Results-driven goals.  And it works.   In many ways, strategic goal-setting has made the difference in my life between moving forward and standing still.

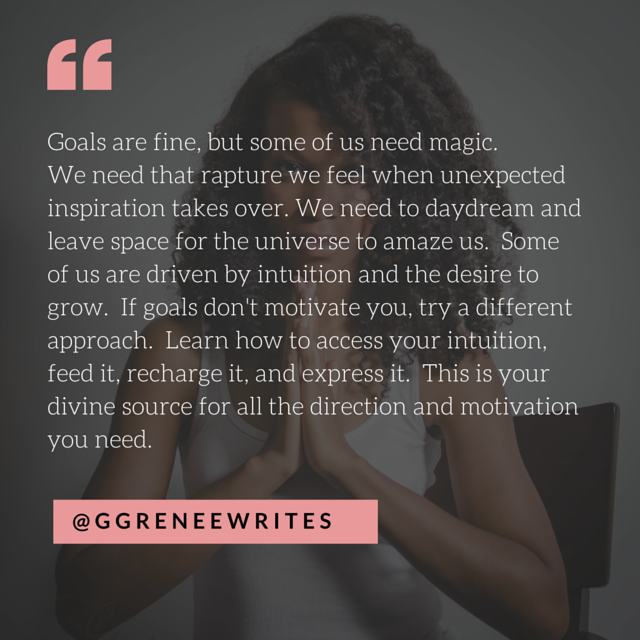
But the thing is, some of us need magic.  

We need that rapture we feel when unexpected inspiration takes over.  We need to daydream and leave space for the universe to amaze us.  And I know now that this is why goal-setting, checking things off, and then goal-setting some more, always felt empty and unsatisfying to me.  When it comes to your life, goal-setting can feel restrictive, like it's squeezing all the juiciness out of your journey.

For a long time I was stagnant because I didn't know exactly what I wanted.  My intuition whispered, and I could sense it, but there was nothing concrete to act on.  I was looking for certainty and all I found were hints and breadcrumbs that weren't substantial enough to command my attention.

If you would have asked me about my goals, my answers would have been lukewarm.  Full of should's and supposed to's, painting a picture that didn't come from my own vision.  I didn't understand how I felt so ambitious and so lost at the same time.

I started trusting my intuition out of desperation.  I was miserable and finally open to the idea that what seemed to work for other people, may not be what would work best for me.

If someone tells you that something should turn you on and it doesn't, you can't force it.  But you can open up to your curiosity and start figuring out what does.  You can turn your attention to those hints and breadcrumbs and start following them, on purpose.

But we do need discipline and we do need to have plans and intentions, right?   

Yes, but for those of us who hear the music differently, we need to take a more fluid approach.

If you ask me now about my vision for my life, you'll have trouble shutting me up.  I'll tell you about the backed up creative energy I have inside and how I'm obsessed with releasing it into the world.    I'll tell you about how much I want to learn and grow and experience.  I'd give you some background on how I used to be, how I never trusted my visions or believed that they mattered.
If you ask me now what drives me and what dominates my thoughts,  I'll tell you what I want most is to grow.  And experience life deeply.  And capture it creatively.  The desire to grow motivates me through my struggles and pushes me past the limitations I used to put on myself..

I don't even think about goal-setting anymore; very much the same way I don't think about mothering.  It's a seamless part of my being.  It's an awareness that guides me and wakes me up in the middle of the night from the deepest sleep when my child is coughing.   It's a knowing that pulls me toward certain opportunities and ideas, not knowing where they will lead, but knowing that's the direction I need to go.

The desire to grow motivates me, keeps me active and focused, and it's more compelling to me than setting goals.

I'm always open to different possibilities and  I don't want to be too attached to specific outcomes.  My visions stimulate me and I trust the way they pull me toward what's beyond my physical sight.  Being too focused on goals can narrow your journey down to accomplishments, which are great, but the best part of them is getting to see who you're becoming in the process.

If goals don't motivate you, try a different approach.  Trust your intuition and consider letting yourself flow naturally, so you can find a rhythm that keeps you moving and makes you feel part of something bigger.  Learn how to access your intuition, feed it, recharge it, and express it.  This is your source for all the direction and motivation you need.

Is there anyone out there like me, who's ambitious but totally uninterested and unmotivated by setting goals?  Share with me in the comments.

3 Easy Ways to Maintain Your Twist-Outs at Night

$
0
0


Tiffany writes:
"I did some small twists and wore those for a few days and now I have the best twist out I've ever had. But I can never seem to keep the results for more than a day, and I REFUSE to put all those twists back in every night. Anybody have any suggestions on how to maintain the definition overnight? I usually just put my bonnet on and pray for the best in the morning!"
Read More!>>>

Jamila responds:

As with any protective style, always remember to moisturize. Before setting your hair for the night, I suggest spritzing with water or another moisturizing agent and sealing your ends with an oil or butter. Here are two simple ways to maintain your twists and twist outs for days!

Retwist in Big Chunks: 

It may seem like a pain, but retwisting your hair at night is one of the best ways to maintain the definition of your twists. Don't worry-- you don't have to do mini twists every night to get the same look, you can retwist in bigger sections and get similar results!


Tips from the video: 
  • Take a big section of hair and stretch it out a bit 
  • If sections are frizzy, take shea butter or other creams and smooth it over each chunk 
  • You might want to stick with a lighter product so it doesn't weigh down your twists
  • Get the twist really tight at the root, otherwise it will unravel 
  • If ends unravel, take a little bit of styler and twirl it on your ends for hold 
  • Sleep with a satin bonnet!
  • In the morning, separate them like normal and fluff at the roots 


Scrunchie Method: 

This is taken from Naptural85. Watch her maintaining routine starting at 5:15.

Tips from the video: 
  • Spritz your hair with water at night to moisturize 
  • Secure your hair with a satin scrunchie and make a bun
  • Make sure your ends are secure in the scrunchie 
  • Cover your hair with a satin bonnet! 
  • In the morning, shake it loose and re-mist with water. 
  • Separate your twists with your fingers for some extra volume. 


Pineappling: 

Pineappling refers to putting your hair at the crown of your head and securing it with a loose ponytail. Check out CurlyNikki's pineappling method! If your hair is shorter, you will need to try the multi-pineapple. Here's a guide on how to pineapple for all lengths...from twa to bsl. 

Ladies, how do y'all maintain your twist outs at night? 

This post was originally published on June 2012 and has been updated for grammar and clarity. 

Coping With Natural Hair Frustrations

$
0
0
22-6-2015 1


Have you ever woken up one morning and had no idea how to begin to tackle the madness that is your hair? Story of my life, honey! I will keep it real with you guys-- I am a long term protective style junkie but once in a while, I like to switch it up a little to give my hair a break and enjoy my length. I may look put together, but trust me girl, it takes WERK! I honestly could not keep up if I had to style my hair every few days, I love the simplicity and low maintenance of my two strand twists.

Anywhoo…wearing my hair out has meant that my hair does not retain moisture for as long as it usually does when I have my hair in twists. Not to mention, tangles on tangles on TANGLES (it's like inception: a tangle, within another tangle, inside of yet another tangle, living in a web of hair. I think you catch my drift) I was so overwhelmed trying to tame my tresses that sometimes I opted to wear a turban and channel my inner Ms. Badu.

You are not alone sister, this very hair that I spend so much of my energy trying to nurture can sometimes drive me up the wall. Just don’t do anything irrational like pulling out your hair, which you will come to regret later. Instead, breathe, take a step back, and follow my tips toward stress-free hair care…

Read On!>>>


  1. Keep it 100
You have to be honest with yourself. Us naturals get it wrong when we set unrealistic hair goals and targets, and then get frustrated when our hair does not make the cut. It’s like setting yourself up for failure. You can’t start off with a TWA and expect to be waist length in a span of one year sweetie, it doesn’t work like that. Like I said in a previous post, natural hair takes commitment, and you need to be both realistic and patient.
  1. Appreciate, don’t equate
The worst mistake you can make is to compare yourself to another naturalista, big no-no! Others’ natural hair journeys (mine included) should serve as an inspiration for your own, not as a benchmark for you to constantly measure up to. Each of us are individuals, which means we can never be exactly like someone else. Which means, that though your hair may resemble someone else’s, it is still YOURS and unique to YOU! What works for one person may not work for another, so it’s best to find what works for your hair and stick with it-ditch the comparisons because 9 times out of 10 you’ll find your hair won’t ‘match’ up which can completely demoralize you.
  1. Focus on health and length ALWAYS follows
At the beginning of my hair journey, what motivated me was length. I’d see all these naturals with hair flowing down their backs and go green with envy. I tried every ‘trick’ possible in the race to grow my hair, and put unnecessary pressure on myself with quarterly length checks to check my progress. In the quest for longer hair, I lost sight of one of my fundamental principles-LISTEN TO YOUR HAIR, CATER TO ITS NEEDS. Once I began to focus more on maintaining the hair I already had on my head and stopped chasing new growth, my hair began to thrive. Healthy scalp and hair is the foundation for hair growth, so focus your energy on finding the right products, regime, and styling techniques that work for you and your hair and you’ll see a difference.
  1. P.S- I love you
I LOVE protective styling, that’s no secret. One thing that has helped me curb my natural hair melt-downs is planning my hair care around my lifestyle. Because I find it way too taxing to style my hair every morning, it works for me to have my hair in twists which hold styles for up to a month (with sufficient re-moisturization and maintenance). Find a style regimen that not only works for you, but that helps you accomplish your hair goals. Protective styling helps me maintain my hair in a stretched state which decreases tangles, retain length due to low manipulation and protection of my ends as well as allows me to save on time spent styling daily.

Love the skin you’re in, and love the hair you’ve been blessed with. None of these tips hit home at the end of the day if we forget about self love. Appreciate yourself and embrace your hair, and you’ll find your frustrations carried away on angels’ wings. Peace and positivity…

How do you deal with natural hair frustrations?

How to Cheat Your Way Through a Crochet Wig

$
0
0


by Jascmeen Bush of Jascmeen.com

What happens when you take ALL the shortcuts? A disaster, usually. But not this time.

I watched several YouTube tutorials on crochet braids and wigs and since I was strapped for time and a bit impatient anyway, I decided to take a few shortcuts to get my desired look. I wanted a very full, classic halo Afro shape, but you can tweak these steps for a heart-shaped fro, asymmetrical cut, or curly bangs style. The whole shabang is pretty cheap. Here’s what you’ll need:

Read On!>>>


jascmeen_crochet_wig

A stretchy net cap, a wig head, a interlocking needle, and the kinky hair of your choice. I went for the stretchy cap so I wouldn’t have to be bothered with attaching combs, and I chose 10 inch hair to limit the amount of cutting and shaping I would have to do when the wig was complete. All I really needed was a big poof of kinky hair, I figured I could do a roller set or twist-out on the finished wig to add dimension at the end if I ended up wanting something with more shape.

jascmeen_crochet_wig_2

Start by pulling the cap over the face of the wig head. It’s more important to get a feel for the center of the net than to try to work around the physical features of the wig head. As long as you can keep everything in relation to the center seam of the stretchy net, you’re good.

jascmeen_crochet_wig_3

The hair comes sectioned off, I split each mini loc in half and into thirds when I got to the top of the wig. I coated them with a bit of water and leave-in  conditioner for softness.

jascmeen_crochet_wig_4


 jascmeen_crochet_wig_5

jascmeen_crochet_wig_6

The actual “crocheting” process was pretty easy. Go under the net with an open hook, hook facing downward. Then go through the net, insert your hair, close the hook. Then pull the hair through the loop and secure. You can choose to make another knot but this hair was so kinky it really didn’t need it. Boom, another shortcut.

jascmeen_crochet_wig_7

I tried to separate every knot by two finger spaces but for a look like this, the thicker the better. I fluffed as I went and started to make the knots closer together toward the center. Any wig that doesn’t involve a part can be done this way. If it starts to look like a mushroom thats okay, you can cut and shape at the end.

Since I went with short hair I barely had to do any trimming. I tried a few techniques I learned from this video but I actually could have worn it as is. Not to shabby for a shameless cheater? Lol

IMG_9746

SHOW AND TELL- FIERCE FRIDAY!

$
0
0
Hola Chicas!
Fierce Friday is a way to celebrate our natural hair, displaying our dopest styles and best hair days... for inspiration and motivation. Wanna be featured? All you have to do is upload your favorite pics to Instagram with the tags #FierceFriday and #CurlyNikki. Be sure to share a brief description of the style, where you were headed, why you felt amazing, etc.!
S T Y L E and G R A C E  #thirddayhair @posh_syd

Curls for Days.  #indynaturals #naturalistasinnap #productjunkies #naturalhairproducts #indynaturals #naturalistasinnap #indy #curlbox #curlynikki #curlkit @daricerene

 READ MORE>>

I am aware of the magic I possess ... I will cause intrigue ... And only that.. I am magic the blessing and the curse @priceless_tamara


Sweeter than Ben & Jerrys. #VivrantThang @hello_curly


Texture shot #washngo #sheamoisture #curlysouffle #ecostylerarganoilgel #naturallycurly @ilikeweirdos35


Winter Protective style #lovewhatIdo #lovenatutalhair #natuarlhairsylist #naturalhair @stylebylynise


Love when my pre teens are so confident and know what they want #bigchop #chicagostylist #rogerspark #devachan #curlsandcompany #curly  #curlyhair #naturalhair @thecurlwhispererchicago


This red lip changes the whole dynamic of the picture! #💕a red lip #revlon #foreverscarlet #Naturalhair #naturalhaircommunity #curlynikki @nat_frobella


Yellow hair don't care, lol🌻😁#naturalhair #Blonde #afro #naturalchixs #naturalhairdaily #myhaircrush #Teamnatural_@gemtrendsetter

Heat Damage in Natural Hair

$
0
0

Photo Courtesy of Natalie Live
 by Amanda

When embarking on your natural hair journey, everything has to start with a healthy foundation for optimal results. The best way to think about your foundation is the virgin hair growing from your scalp. Whether you were a straight-haired natural, "heat trained", or straightened your hair six times a year, anyone who uses heat tools is susceptible to experiencing heat damage. Still uncertain (or in denial) that you have experienced heat damage? Consider this.

Read On!>>>

Hair is dead

Hair is keratin that grows from follicles in the scalp. The hair shaft is considered dead and is not an organ like that epidermis. Hair does not undergo mitosis and heal when damaged like an organ would. To restore extreme damage requires simply growing your hair out. Therefore, all hair care products are designed  with the intention of preserving or altering the hair through maintenance and style manipulation. Hair products only create temporary fixes not permanent ones.

Whether you are washing, combing, styling, using heat tools, chemically altering, or even relaxing in the sun, the hair’s cuticle is always receptive to being damaged but certainly at different rates and intensity depending on the cause. This does not mean that you should not care and enjoy your hair, but it is important to establish what hair is in order to fully understand how to care for it. There are no rules. All hair care tips are merely suggestions to better educate and equip you take make informed decisions about your hair. Now, let’s move on to heat damage. 

Heat damage can be cumulative

I get it. You stopped straightening your hair three months ago after straightening it consistently for two years.  Well, there is a strong possibility that you have accrued heat damage. Heat damage does not have to manifest after one experience with heat tools (e.g. blow-dryer, flat iron, curling wand). Hair care is all about preservation. The hair’s cuticle is being chipped away little (or a lot) at a time, which usually requires to trims. The more heat tools you use, the more damage your hair is experiencing. Should you not straighten your hair? You can if you want to! Have fun! Do what works for you, but be familiar with the damage that you will likely experience.

Heat damage can happen in just one use

Temperature matters. According to chemist JC from The Natural Haven, “If you heat keratin to around 215-235°C ( 419-455F) the alpha helix starts to melt.” Heat setting should be determined by the width of your strands. Coarser strands (wider in diameter) tend to withstand hotter temperatures, while finer strands are less likely to experience damage with lower temperatures. That one time you used a CHI flat iron with no temperature setting is enough to ruin your curls once. When shopping for heat tools always invest in stylers with controlled heat settings. No one wants to be five-years natural and permanently destroy their curl pattern with one pass. Most do not exceed 375-400 F.

Heat damage manifests in different ways

Heat damage is not always straight hair. Heat damage can manifest as a looser curl pattern, frizz, or even excessive brittleness. It is possible to completely strip away the cuticle, making the hair unbearably porous. If you have noticed a difference in the texture of your hair (i.e. aesthetic and tactile), then that could be an indication of heat damage. 

There is no guaranteed way to avoid heat damage

Again, using lower heat temperatures decreases the likelihood but does not guarantee heat damage will not occur. Everyone’s hair is different, even if you do share the same curl pattern and width. All you can do is take the proper precautions.

Heat damage is irreversible

You can reduce the severity of your heat damage by using safe practices, but there is no magical product, technique, temperature, tool, or regimen to completely prevent heat damage, and when it occurs it is irreversible. You should always deep condition and do a protein treatment after using heat tools. This can improve your hair’s elasticity and provide a temporarily repair of the hair’s cuticle. Deep conditioners and protein treatments will not guarantee curl reversion and there is a strong likelihood that your hair will not feel or behave the same.
 
The only way to remove heat damage is by cutting the damaged ends or transitioning. Remember that the best way to prepare for heat styling is to clarify (not co-wash), deep condition, apply a leave-in conditioner, and a heat protectant. There is nothing wrong  with enjoying your curls and exploring your options, but remember that too much of anything is never a good idea.

Follow Natalie (pictured above) here:
The Tiny Closet and Instagram

DIY Balanced Protein Treatment for Stronger Hair

$
0
0

by Emilia Obiekea of AdoreBotanicals.com

Our hair needs a good balance of moisture and proteins. Protein treatments are wonderful for maintaining that balance. True protein treatments are done using hydrolyzed proteins. They are able to penetrate the hair and provide strengthening. The cheapest, most easily accessible and effective hydrolyzed protein I've found is gelatin.
 
Yes gelatin!
 
It is much more effective than mayo, eggs, peanut butter, etc... Those items molecules are too large to penetrate the hair. Gelatin is able to penetrate the hair beyond the cuticle making this an ideal DIY protein treatment. Many have their own versions. This treatment is one of my favorite recipes I have created to date.

 Gelatin Protein Treatment
 
Ingredients
  • 1 ounce of plain gelatin
  • 1 cup coconut milk
  • 1/2 cup of distilled water
  • 1 tablespoon of each: chamomile, peppermint, rosemary, honey
  • 2 tablespoons of sweet almond oil
Utensils
  • 1 plastic/glass of each: bowl, spoon, jar
  • 1 small pot
  • 1 wisk
  • 1 dye applicator bottle
Steps
  • Warm the coconut milk.
  • Put the chamomile, peppermint and rosemary into a bowl.
  • Pour the warmed coconut milk over the herbs in the bowl. Cover and allow to steep until cool.
  • Strain the milk and discard the spent herbs.
  • Simmer the distilled water and whisk in the gelatin, sweet almond oil and honey. Blend very well with whisk until it's smooth.
  • Add the infused coconut milk to the distilled water mixture. Warm them together. Be sure to blend if needed. Remove from heat. 
  • Allow it to cool then pour the solution into a dye applicator bottle.
Use
  • Be sure it is completely cooled before use. 
  • Shake well.
  • Apply it to freshly washed. dampened hair.
  • Cover the hair. Leave in for 10-15 minutes. 
  • Rinse well with luke warm water. 
  • Follow up with a very moisturizing deep conditioning treatment for 30-45 minutes. Heat use is optional.
  • Rinse well.
  • Make the final rinse with cool or cold water.
  • Use a microfiber towel to wrap the hair to dry.
  • Lastly, moisturize and seal as normal. Can use the LCO/LOC method
 
The results? Strong, shiny and soft to the touch hair!
Give it a try and see how well it works for you.
Enjoy!

Wash and Go's On Type 4b/4c Hair-- Are They Worth It?

$
0
0


by Ariane of BlackNaps.org

Many are under the impression that wash n go’s aren’t even achievable on 4b or 4c hair, but using the right technique it is entirely possible. The question is however, are most naturals willing to do what it takes to achieve these results?

Read On!>>>

If you are thinking about doing a wash n go style 9 times out of 10 I guarantee you are hoping to sustain some curl definition. The issue is, in order to retain the curl definition in 4B or 4C hair there is a whole lot more effort than just simply washing your hair, adding in some product and going. Try doing that and you’ll end up like this:


There is a whole lot more to the process and in truth it really should be referred to as a “work n’ go”.
You have to really make an effort to shingle product through your hair section by section making sure your defining your strands, which is definitely not a 5 minute deal.


This is why LiveNaturallyLove’s wash n go came out so awesome! She worked section by section: first by cleansing her hair, then conditioning, adding her whipped Shea Butter, and her botanical gel by Camille Rose.

Sadly, after you have put in all that work you may get 2 or 3 days tops wear out of your wash n go and you will have to repeat this process all over again if you desire the same look.

 My Wash n Go Hair Closeup
My wash n go results on my 4B/4C hair!

Although I loved the results I achieved with wash n go’s the time commitment involved just isn’t for me personally. I ended up damaging my hair from it. When it was time to go to sleep I neglected to at the very least pineapple my hair and that led to my hair getting matted. After all the work I put into getting my wash n go look in the first place by the time I was ready to go to bed, hair was the last thing I was thinking about. My life does not revolve around my hair and admittedly sometimes I am just lazy.

At this point I can see myself reserving wash n go’s for the summer, but for the vast majority of the year protective styles will be my go to. Protective styles are just easier in that they keep my hair consistently looking together for a longer period of time. To maintain, I simply have to wear my bonnet at night, moisturize daily and literally get up and go. Being that I will be a new mommy soon, I think this is going more suitable for my lifestyle and the effort I want to put into my hair.

For some 4B/4C naturals wash n go’s are heaven sent because with proper care you may enjoy the moisturizing benefits this style choice has. However, if you choose the wash n’ go route here are some considerations and things to expect.
  • If you must have defined curls to enjoy your wash n go you may not enjoy the time you must invest. You must shingle your hair section by section for definition.
  • You need quality products! Use the wrong ones and you will be left with a dry mess. See the Best Products for Wash n Go’s.
  • The products you use will get used up more quickly because you will use them more frequently. So it can get pretty pricey.
  • You must embrace some form of shrinkage with wash n go’s. If you need some elongation be willing to invest in a diffuser attachment and spend more time on your hair stretching it.
  • The results are not long lasting. In many cases at least by day 3 you will need to refresh your hair.
  • You still should either be putting your hair in large twists or pineappling (a high ponytail) to avoid tangles and matting at night.

Sound off naturals! What are your thoughts on wash n go’s?


Rebecca Is Naturally Glam!

$
0
0

Tell me about yourself!
My name is Rebecca Boyd and I was forced to transition after allowing my then 14 year old daughter to perm my hair.

READ MORE>>
All my hair fell out so I decided no more relaxing.It took two years for my hair to grow back


How did family and friends react to your decision to go natural? What was your response to them? 
My family saw how fast my hair grew and how thick it was and loved my going natural. I even convinced my daughter to go natural and she loves her new look.

Describe your hair.
 I have coarse hair that frizzes when it is humid and hot.


What's your current hair routine? 
I wash my hair when needed. I'm not currently employed so I get my products from the $1 store. I use leave in conditioner and Castor oil to maintain my look and wrap it at night with a do- rag.

What’s your favorite hairstyle? Where do you get hairstyle inspiration?
My fave look is just to let it hang naturally. I haven't mastered other styles and often find myself on YouTube for ideas.

Who is your curl crush?
I'm my own hair crush cause I love me some me.

What's the best thing about being natural?
The best thing about being natural is that it saves money and time.

Where can folks find you on the web?
I can be found on Facebook under my name and Twitter under Rebeccab923

Hair Tip Tuesday: Don't Weave It and Forget It!

$
0
0

by Toia B. of LuvTobNatural.com

I understand… sometimes our hair needs a break or we may want to make life a bit easier by installing a weave. Thing is, while they can be cute, some of us forget that we actually have hair under there! O_O Some women (and I know this for a fact!) feel that once they slap that puppy on, they can just get up and go for months on end without giving any attention to the hair growing out of their scalp. No bueno, kids!

You MUST take care of your OWN hair, even especially when you were weaves and wigs. That closed-in environment can become a hotbed for bacteria and fungus! Leaving your hair to its own devices can lead to buildup of excessive dandruff and more serious issues like hair loss and infections.

PLEASE, regularly cleanse, condition and moisturize your hair and scalp.

But some may wonder…

How Is That Possible With a “Sew-In”?

Sure, your hair may be all braided up but you can still effectively cleanse your scalp. Simply lift and section off each weft and apply your shampoo to as much of the area as you can. Here’s what I used to do: while in the shower, I’d wet my hair, apply the shampoo to each exposed row of scalp, massage it in, let it sit for a few minutes to let it do its thing, rinse and repeat. Same with the conditioner. Afterwards, be sure to completely dry your hair.

To prevent excessive dryness, some may use an applicator bottle of oil for the scalp and hair to lubricate the situation. Others may combine their favorite oils, a leave-in and other ingredients (such as glycerin and other humectants) into a spray bottle for easy application. Take a look at my spray bottle concoction.

So, ladies… don’t weave it (or wig it) and forget it! A protective style means nothing if you don’t actually take care of your own hair while wearing it.

If you wear weaves or wigs on occasion, how do YOU care for your hair? What are some techniques that have worked for you? Share below!

Doing the Most? Simplify Your Natural Hair Regimen!

$
0
0

 
Photo Courtesy of Cyn

by Amanda
 
Hair care does not have to be complicated. Ask anyone with healthy, full, natural curls what’s their magic, and most will say a simple regimen. Hair care basics include cleansing, conditioning, and moisturizing, but most naturals have steps in addition to these because everyone’s hair is unique. It is important to do what works for you and usually doing too much never works for anyone. Here are four ways you may be complicating your regimen, making your hair care journey more difficult than it has to be.

Read On!>>>


Using a co-wash after your shampoo  
Co-wash is a verb and a noun. Originally, co-wash was known as cleansing and refreshing your hair with a daily, rinse-out conditioner. Now, brands are formulating co-wash conditioners, also known as cleansing conditioners, with gentle surfactants that help to mildly cleanse and nourish the hair. Cleansing conditioners are not designed with the intention of replacing shampoos or clarifiers rather to be used alternately. 

If you are using a shampoo, then it is unnecessary to follow up with a co-wash or cleansing conditioner, as a co-wash is a gentler, cleansing alternative. A shampoo should always be followed up with a deep conditioner or daily conditioner while a co-wash may not require that a deep treatment after, depending on how your hair feels.
Pre-poo and co-washing 
 Since a co-wash is designed for gentle cleansing, it is not necessary to pre-poo. Cleansing conditioners are not created to effectively remove all oils, product buildup, and residue on the hair and scalp like a shampoo. Therefore, using a pre-poo before a co-wash only creates an additional layer that your co-wash may not be able to completely remove. If your concern is excess dryness, then either deep condition after using a cleansing conditioner or use a different co-wash that is less drying.

Daily conditioners and deep conditioners are formulated to restore the pH levels of the hair after cleansing, so a little dryness after clarifying should be expected. The softness you feel on your hair from constant co-washing and pre-poo is probably product residue, which could eventually make your strands excessively dry over time and even agitate the scalp. Pre-poo treatments are better suited to precede clarifying your hair, especially if you have not found a shampoo gentle enough to make your pre-poo treatments unnecessary.

Using a daily conditioner and a deep conditioner 

Using a daily conditioner and deep conditioner in conjunction with one another is unnecessary. After cleansing with a shampoo or clarifying, you can use either a daily conditioner or a deep conditioner. A deep conditioner is a daily conditioner on steroids; therefore you are not missing any benefits by omitting the daily conditioner. Use either or. If you are using a co-wash conditioner or cleansing conditioner (not daily conditioner), then it is ok to use a deep conditioner after you cleanse.
Even though people use daily conditioner to co-wash their hair, rinse-out conditioners are not formulating with cleansing properties, so using a deep conditioner following a daily condition may be causing product buildup.

Using different products for each hair texture

Most if not all people have multiple curl patterns. This usually manifest in the crown and/or hairline. It is superfluous to buy products to create two separate regimens for 3c/4a hair. It is also unnecessary to create two different regimens because your have highlights, as the lightened strands are more porous than the virgin strands. Simply find products that meet the needs of your entire head. Using products for color-treated hair should work just as well on your virgin hair. Maybe your crown requires an additional layer of oil, but I would not buy three different shampoos, conditioners, and moisturizers because I have a hodgepodge of curls. Do not make this journey or transition harder than it has to be.

Building a regimen takes years for some and one attempt for others. Excessive products and product usage are usually indications that your products may be sub par to your expectations, so remember to take your time finding products that meet your unique needs so you will not waste your money and time.

Follow Cyn (pictured above) here:
Addicted2Etsy and Instagram

Have you been guilty of making your regimen complicated?

How to Moisturize Your Highly Porous Hair This Fall and Winter

$
0
0


Fall is upon us and winter is not far off as we are feeling the cooler temperatures and gearing up for the holiday season. It may not be apparent just yet, but naturals will need to get ready for the fall and winter weather for our hair. More naturals will be protective styling or adjust their spray bottle concoctions, but naturals with high porosity hair will also need to find ways to absorb just enough moisture - and retain it.

Hair porosity is fundamental to understanding your hair type. It may not get as much attention, but knowing your hair’s porosity will make caring for your tresses simpler and retaining moisture easier. With curly hair, moisture retention is top priority. Hair porosity is how well your hair will absorb and retain moisture, oils, or chemicals (like color) and is affected by the elasticity of one’s hair cuticle. The cuticle’s condition determines how easily moisture will pass in and out of your strands, and yes it does go both ways meaning your hair’s cuticle can receive moisture and it can lose it.

There are three types of hair porosity: low, medium, and high. Genetics is the biggest factor that will determine your hair’s porosity when at a healthy state. Other factors in hair porosity have less to do with genetics and more with external influences like exposure to chemical treatments, heat styling, and environmental elements. High porosity hair has holes and gaps in the cuticle layer, which allows moisture to be quickly absorbed and quickly released. Please do not make the mistake of thinking high porosity hair cannot retain adequate moisture without losing it all. It takes extra work and knowledge to find the right routine and techniques to keep your hair healthy during the colder months. Here are a few tips that will help.

1. LOC method

The L.O.C. method works best for tightly coiled naturals (Type 4) and high porous hair since both crave water. This method is perfect for getting the right amount of moisture in and keeping it in by layering the products in a specific order to receive maximum moisture retention. Liquid or leave-in conditioner will add the moisture, the oil will seal it, and the cream, butter, or even gel is just another layer of sealant. You may be wondering why sealing is necessary if your moisturizer is formulated with oil and Janelle elaborates on the importance of sealing.

2. Protein treatments
They are great for year-round, but if you have been slacking on them while frolicking in the sun this summer, then you really should incorporate them during this winter. High porosity hair is more vulnerable to dryness during the winter and protein treatments give your strands strength by temporarily patching up the holes in your hair’s cuticle layer. Monthly treatments are great during winter, but do not use protein treatments as a moisturizer or use them frequently like you would a moisturizer. Too much protein is just as bad as not using it at all and can make the hair brittle and cause it to break.

3. Gentle cleansers
Shampoos clean your tresses and the surfactants in them do the job effectively. The problems some (not all) surfactants is they (e.g. sodium lauryl sulfate) can strip the natural oils out and even make worsen the holes and gaps in high porosity hair. There are naturals who love shampoo and swear by gentle and moisturizing shampoos and forgo co-washing. With the dryer weather it just does not pay to use products that can potentially make your hair drier than need be, so the cooler months may be a good time to start reincorporating co-washing.

4. Heavier oils and butters

For effective sealing during winter, try heavier products like shea butter, olive oil, avocado oil, or castor oil. Use products that have them in the first five ingredients to ensure you are getting the full benefit of the heavier oils. They not only help with sealing your porous tresses, but they add that protective layer your strands may be lacking.

How do you care for your high porosity curls, coils, and waves in the colder months?

7 Oils for Natural Hair Besides Coconut Oil!

$
0
0

 by Charlene Walton of TexturedTalk.com

I love coconut oil just as much as the next person; however, there are several other oils for natural hair that reap the same, if not better benefits. Don’t get me wrong, coconut oil is great! I use it as an as a substitute for lotion, a makeup remover, for cooking purposes, and even oil pulling (that one time I tried oil pulling lol); however, let’s explore other impressive oils for natural hair that you should try. But first, do you know the difference between an essential oil and a carrier oil? If not, keep reading to find out.

Read On!>>>

Carrier Oils– Carrier oils are vegetable oils derived from the fatty part of a plant, usually the seeds or kernels. Some are able to penetrate the inner cortex of the hair shaft for conditioning while others also work well to seal moisture through creating a light barrier on the exterior of the hair cuticle. When used in conjunction with essential oils, they “carry” the oils to your skin and hair, given that essential oils are extremely light weight and evaporate quickly.

Essential Oils – Essential oils are plant-based oils distilled from leaves, bark roots and aromatic portions of a botanical. With an extremely concentrated smell, essentials oils also have small molecules that evaporate quickly within the scalp. Due to their light, molecular weight and water-like consistency of these oils they are not used for sealing moisture. However, essential oils are great as scalp stimulators.

7 Amazing Oils for Natural Hair…That’s NOT Coconut Oil

1. Avocado Oil – Type: Carrier Oil

I know I just talked about avocado oil last week in my CurLUXE naturals review; however there’s no harm in mentioning it again simply because I love it so much. My fascination with avocado oil includes its light weight and molecular ability to penetrate the hair shaft for intense deep conditioning when combined with other ingredients. Vitamin rich and full of fatty acids it also helps to heal damaged, weak hair.

2. Babassu Oil – Type: Carrier Oil

Babassu Oil is extracted from the tree nuts of babassu palm trees grown in the tropical forests of Brazil. Babassu oil is light weight as well and locks in the hair’s natural moisture, adding luster, shine and elasticity to the hair. For skin care, its emollient properties are also claimed to help in the relief of itchy scalp, eczema, and psoriasis, which is also similar to a few benefits of coconut oil.

3. Peppermint Oil – Type: Essential Oil

This essential oil not only smells wonderful but can be used weekly to treat yourself to a scalp massage in order to promote growth. Peppermint oil, similar to a few other essential oils, are known to stimulate blood flow to the scalp, helping with hair growth. Just remember to combine a few drops of this oil with another carrier oil for best results. No worries, I’ve included a DIY recipe for you to pin or print below.

4. Wheat Germ Oil – Type: Carrier Oil

A little less widely talked about, wheat germ oil is not one to be skimmed over quickly. As the name suggests it is a plant derived oil and is very rich in linoleic acid, similar to avocado oil, which is very rich is omega 6 fatty acid. As the richest source of vitamin E than any other natural oil, use wheat germ oil for extremely dry hair to add moisture and softness. Due to its thick consistency, mix with another carrier oil, add to your spray bottle of water and aloe vera juice or add a little to your favorite conditioners. Since it has high emollient properties it also works well to be added to your favorite deep conditioner.

5. Rosemary Oil – Type: Essential Oil

Fully packed with loads of antioxidants, Rosemary oil is one of the best oils for natural hair known to stimulate hair growth as well as retard premature thinning and graying. As with many essential oils, rosemary oil helps to soothe and condition the scalp, helping with dandruff and itchiness.pumpkin seed oil

6. Pumpkin Seed Oil – Type: Carrier Oil

In a Fall mood and obsessed with pumpkin like everyone else? Pumpkin oil is said to block the androgen hormone dihydrotestosterone (DHT), which causes hair loss. You can purchase this in the form of a pill or just a jar of oil. Click here to see how one woman used it to fight alopecia.

7. Ylang Ylang – Type: Essential Oil

This essential oil is best for healthy scalp maintenance as it helps to normalize sebum production on the scalp. Since naturally curly hair is prone to be drier given our natural sebum has to work harder to travel from root to tip, this may or may not be of concern for you depending on hair type. However, if you feel your hair produces more oil than normal, you might want to give this essential oil a test.

Here’s a quick oil blend for you to try at home.

Easy DIY Healthy Hair Oil Blend Recipe:

Carrier Oils:

2 Tablespoons of Avocado Oil
2 Tablespoons of Jojoba Oil

Essential Oil:

6-10 drops of peppermint oil (3-5 drops per teaspoon)

Step 1: Mix all oils inside plastic bottle

Step 2: Shake well and apply to scalp for massage or apply to hair for sealing moisture!

DIY OIL MIX Infographic

What are some of your favorite oils for natural hair outside of coconut oil? Comment and let me know!

Luciana Is Naturally Glam

$
0
0

My name is Luciana and this is my journey (back) to natural.

Were you a long term or short term transitioner, and why?
I was a long term transition. I've never had short hair before, so I was a bit afraid of the big chop. However, I can totally see myself big chopping my next go round.

READ MORE>>

When did you BC? What was your initial reaction to your natural hair? 
My last perm was in April 2010, which was actually after my first attempt at transitioning (9 months). I regretted that perm almost immediately and decided it would be my last. I grew it out and finally chopped off those dreadful straight ends in October of 2011. My initial reaction to my natural hair was pure joy; to finally see my true curl pattern! Bliss!

How did family and friends react to the new you? What was your response to them?
My family was surprised but very supportive! Their support is what got me over that second 9 month mark because that was my biggest struggle during my transitioning phase. Those straight ends are the work of the Devil.

What was your transition routine (products included)?
My transition routine was co-washing, moisturizing with the LOC method and protective styling. I used very little heat during this time because I was aware of how fragile my hair was during the transitioning phase.

What was your staple hair style during the transition?
My staple hairstyles during the transitioning phase were twist-outs, braid-outs, buns, and flat twists.

How did you moisturize your hair to prevent breakage at the new growth line?
I used the LOC method (Liquid, Oil, Cream). Water or sometimes a mixture of water and conditioner was my liquid. My hair loves coconut oil, so that became my staple oil. And while transitioning, I was a faithful Cantu Shea butter user.

Why did you choose to go natural?
My choice to go back natural had a lot to do with my daughter. At the time, she was at the age where she was wanting to express herself with her hair. She wanted to try weave and see what her hair would look like straight; so I decided to try natural hairstyles on her like braids and twist outs because I didn't want her to get a weave or a perm. But I also didn't want her to feel like I was preaching to her about natural hair being great while perming my own.

DIY Recipes for Long, 4c Hair

$
0
0

   Photo Courtesy of Craving Yellow


While the natural hair community is booming with lots of products that are organic, paraben-free and sulfate-free, it is still bursting at the seams with mixtresses who create their own hair remedies. It sure does not hurt to mix up your own hair treats once in a while. In fact, many well established brands began right at home by mixing up ingredients that proved to produce great results. These three DIY recipes are easy to make and are budget-saving.

Read On!>>>
DIY Moisturizing Conditioner
This conditioning mix is great for naturals who suffer from dryness, because it is loaded with natural emollients and moisturizers. Honey and glycerin are humectants while Greek yogurt and olive oil contribute to locking in the moisture in your strands.
Combine all ingredients in a bowl with a hand or stand mixer. Whip for 3-5 min., ensuring that all ingredients are well mixed. Transfer your mixture to a mason jar or any other recycled bottle of your choice. After shampooing your hair, apply your conditioner to the length of your hair. Begin at your ends as these as the most delicate and prone to damage. Allow the conditioner to sit on your hair for 20 minutes covered with a plastic cap. Your body heat will aid in the further absorption of the product, leaving your hair fully hydrated. Rinse off thoroughly and continue with your regimen.

DIY All-Natural Detangler

This recipe here has been a lifesaver for me. It melts away my knots and tangles. The secrets to its effectiveness are the emollients. Each ingredient adds lubricating properties to this mix.
  • 4 Tbsp. olive oil
  • 2 Tbsp. avocado oil
  • 2 Tbsp. glycerin
  • ½ Tbsp. coconut cream
Mix your ingredients in a bowl. Make sure that they are fully mixed for an even consistency. Apply to the length of your hair, saturating your strands from root to ends. Wear your plastic cap and leave the mixture on for 25-30 min. This allows the concoction to settle into your strands. The high moisture content will soften your strands and make them supple.

DIY Moisturizing Leave-In Spritz

Many naturalistas commit to spritzing their hair at least once a day, in order to give their strands an extra moisture boost. I’ve found this particular recipe as effective as a leave-in mix.
  • ¼ cup-water
  • 2 Tbsp. aloe vera juice
  • 1 Tsp. glycerin
  • 1 Tsp. olive oil
Pour the ingredients into your spritz bottle. This mix is great for when your hair is feeling dry or crunchy. Whether you are outside playing a sport or simply running errands in hot weather, this spritz will give your hair added moisture. 

What are your favorite DIY recipes? We’d love to know! What ingredients work best for your hair, and which don’t?

I SURVIVED MY FIRST BLOW OUT!

$
0
0


Girl,

DISCLAIMER: This is going to be a long one, so get comfortable. Consume a light snack if possible (Kidding! I’m just being dramatic!)

I preach about my no heat routine, why on earth would I blow dry my hair? Did hell freeze over? Was I kidnapped and held against my will, and my kidnappers torture techniques involved blasting my hair with various heat styling tools? (My mind is a strange place…I know…I know!) But just in case you were about to call the police, no.

Read On!>>>

I have not blow-dried my hair in the past four years *gasps* and I honestly do practice, and advocate for a no heat hair regimen. Cutting out heat from my hair routine has completely helped me not only retain length, but minimize breakage and damage associated with heat styling techniques. Of course, everyone has their own personal preferences and some prefer to blow out and/or flat iron their natural hair, no judgment here girl. To each his own.

My hair is currently heat stretched, and has been so for about a week now. Again, you’re probably wondering why on earth would she break her no-heat rule? I washed and blew out my hair because I was due for a much-needed trim, and so in order to accurately trim it, I decided to straighten it. In fact, I did more than trim, I cut about three or so inches off. *Gasp some more*

You see, long hair does not always equal healthy hair. My personal hair journey is focused on HEALTH and RETAINING the hair that joyfully sprouts from my scalp, rather than chasing length. Why you ask? Because healthy hair practices will ALWAYS result in healthier hair, and promote hair growth. So it’s like killing two birds with one stone. Chase HEALTH and LENGTH will follow, it really is that simple.

I cut my hair because my ends needed a new lease of life! And I am not opposed to cutting off a couple of inches to give my hair what it needs. Now, I’m not saying go crazy and cut three inches off your hair, but pay close attention to your ends, are they splitting, are they frayed? If so, you may be due for a trim!

This experience was completely nerve-wracking for me, I haven’t let another individual do my hair in over four years, and so it was difficult and terrifying to give that control to someone else. Needless to say, I was very vocal and communicated exactly how I wanted to have my hair done-which is SO important. If you are going to visit a salon, make sure the stylist is open to doing your hair the way YOU want it done. Especially when it comes to the temperature of the tools involved, and the amount of hair you’re comfortable with trimming.

Remember to wash your hair with a sulfate free shampoo to ensure you don’t overly strip your hair. Follow that up with your conditioner of choice, and make sure to give it about 10 minutes to soak in before rinsing.

Carry your leave-n conditioner with you, as well as your preferred oil(s) and a heat protectant! Blow dry on low heat, even if it frustrates your stylist it’s what is best for your hair.

Snip snip snip and you’re done! Until next time beloved ones.

keep up with Yvette!

A DIY Caramel Treatment To Soften Your Natural Hair

$
0
0

by Shelli of Hairscapades 

I often get asked about whether there are any natural hair softener options for natural hair and if henna is a good choice. Although henna may soften some curls, it can be hit or miss and seems largely dependent on the thickness of the hair strand and the existing curl formation. Henna tends to loosen the curls of those who don’t want loosening! It’s also a time-consuming process and essentially permanent, so it’s not for the faint of heart! *lol* Finally, if not done right, henna can cause damage and so I always suggest that anyone interested in trying it do their research before making the leap (I read everything I could on henna for 2 months before finally deciding to try it).

That being said, when I was in the CurlyNikki Presents Kim Coles’ Grow Out Challenge (whew … that never gets easier to write!), I read a rave review about a natural hair softener. The young lady called it a caramel treatment. This treatment was generally made with molasses (which gives it the caramel color and consistency – hence the “caramel” moniker), honey, banana baby food and oils, but there are variations on the recipe that can be found online.

Read More!>>>

Now, the old GOC blogs are very hard to find. So, I wasn’t able to find the GOC blog or post about the treatment yet. But I did find this good article on Black Hair Information: The Caramel Treatment- A Natural Hair Softener.

As I wasn’t interested in hair softening, I never tried it. But, I did “lock it in the vaults” as I knew it was good information and might be helpful to someone. And, since I recently got asked about natural curl softeners, I figured the time to open the vaults was now .

That being said, here is a video demonstrating how to make the treatment that might be helpful to those of you interested in trying the treatment.


Ingredients:
  • 1/3 cup of olive oil 
  • 1/3 cup of raw honey 
  • 1/4 cup of molasses 
  • 2 containers of banana baby food 
  • 1 tbs of cornstarch dissolved in water 
  • splash of apple cider vinegar 
Directions:
  • Mix all ingredients together cold in a small pot 
  • Add the cornstarch water mix into the pot while its still cold 
  • Mix well, make sure all the clumps are out 
  • Turn on stove to medium low heat and keep mixing 
  • Once mix begins to boil, turn off the heat 
  • Once cooled, apply mixture generously to your hair
  • Let the treatment sit on your hair for 1 hour, then shampoo off
  • Use this treatment once every two weeks for maximum softness and definition   

Now, it wouldn’t be right for me to share this and not tell you about an article that I found by WestNDNBeauty on Confessions of a Blog Vixen that said that it was a waste of perfectly good banana baby food!  So, guess it doesn’t work for everyone. But, given that the ingredients are pretty easy to find and inexpensive, I figured that some might want to give it a try to come to their own conclusion!!

***************************************

Have you ever tried/do you use caramel treatments? If so, what’s your recipe and what are the benefits?

This article was originally published on February 2013 and has been updated for grammar and clarity.

You Need to Clean Your Hair Brush, Too!

$
0
0

 by Emilia Obiekea of AdoreBotanicals.com

Many of us spend a lot of time and money on hair tools, products and accessories. We all use our own methods for maintaining clean hair. Keeping our hair tools clean is just as important. Try out my quick and simple methods for cleaning hair tools.
  
Brushes
 Remove the hairs trapped in your brush with a hair brush cleaner. 
There are many variations available.
Select the one that would best fit between the bristles of the brush you are cleaning.
This brush cleaner, below, works for most brushes.
(image source: google)
 Once all the hair has been removed from the brush cleanse it with shampoo or a soap of choice.
Remove as much water as you can with a towel then leave it to air dry completely before next use.
Combs & Plastic Rollers
(image source: google)
Rub a bit of shampoo or a soap of choice on to the tool.
If it has gunk on it just use a soft bristle scrub brush to clean it under running water.
In a bowl, pour 1/3 cup of apple cider vinegar (acv) + 1 cup of clean water.
Place your tool in the solution to soak for 10 minutes. Rinse it off with clean water and pat dry with a towel.
Flexi-Rods
(image source: google)
Dampen a microfiber towel in the vinegar solution (1/3 cup of vinegar + 1 cup of water). 
Rub down the outside surface of flexi-rods with the towel. Then dry them off with another microfiber towel.
*Do not soak the flexi rods. The liquid that gets on the inside may not dry and it could mold. No bueno.
Frequency
 For the tools that are used regularly during the week it is good to clean them at least once a week. For others items that are used infrequently they can be cleaned immediately after use.
That's all it takes! Give it a try!

The Best Hair Foams for Roller and Rod Sets

$
0
0

jascmeen_hair_foam

by Jascmeen Bush of jascmeen.com
 
When I was transitioning I relied heavily on rod sets. Call it a fear of commitment, call it hoarding, but I could never be tied down to just one foam. I’ve tried almost every brand and these are the few I keep in rotation. These are the ones that get the “You up?” text, lol.
 
Read On!>>> 
ORS Olive Oil Wrap Set Mousse has the most hold hands down. On the flip side it can be very drying so it should only be used after deep conditioning. If I really need a set of curls to last the full week until the next wash day, this is the one I use.

Creme of Nature Argan Oil Style & Shine Foaming Mousse gives the most shine and since my hair doesn’t have a natural shine to it, I need all the help I can get. For any kind of fancy situation, I use this one because I love the added sheen.

Dr. Miracle’s Healing Styling Foam is the most nourishing. To be honest, foams are by nature very drying but my hair (which is already on the dry side) really loved this one. If I’m doing a rod set but don’t have time to deep condition first, then I grab this little baby.

Carol’s Daughter Hair Milk Nourishing & Conditioning Styling Foam is the most smoothing. It protects against frizz and it really had my back during the humid summer.

What foams do you all use? Or do you hate them altogether? Let’s get into it!

SHOW AND TELL- FIERCE FRIDAY!

$
0
0
Hola Chicas!
Fierce Friday is a way to celebrate our natural hair, displaying our dopest styles and best hair days... for inspiration and motivation. Wanna be featured? All you have to do is upload your favorite pics to Instagram with the tags #FierceFriday and #CurlyNikki. Be sure to share a brief description of the style, where you were headed, why you felt amazing, etc.!
Looking through some old photos..I miss my blonde hair 😣😣 #throwback #naturalhair @chels_lyn

Ever take a bunch of selfies and hate them, only to look at them days later and think they aren't so bad after all? #yeathatpart @faith_fit_curls

Decided to pull my 4th day old twist & curl into a nice sleek curly ponytail. I love a sleek polished look. @butter_curls

2nd day results with @mydevacurl Decadence line via @curlbox natural. My 3rd day results were even better but I forgot to take a pic. I'll share my 4th day results tomorrow #devacurl #naturalhair @_cebelamour_ 
**New Video*** I get so many questions on how to keep natural hair moisturized, so I decided to start "The Moisture Curls Series" on my youtube channel. First video in the series features @oyinhandmade "Juices and Berries" nourishing herbal leave in. LINK TO VID IN MY BIO ;) @hello_curly


Had I known how much money I could save by twisting my own hair... #naturallyshesdope @jaydanielle29


HOTD Fave! #naturallycurly #naturalhairdaily #naturalhairrocks #curlynikki #naturalhair_ #naturalhair @ilikeweirdos35 


The rain tried to take my shine! Nope Curls still popping! @niece426


So this week I may have to do a tutorial and review on the @carolsdaughter #marula #curltherapy line. I went from Afro puff to curly chic. These hair products have made me fall in love with my hair all over again! Who wants to see how I achieved these curls? #washandgohair #washandgo @tish_ferguson

Viewing all 4836 articles
Browse latest View live


Latest Images