Quantcast
Channel: Curly Nikki
Viewing all 4836 articles
Browse latest View live

"THAT IS NOT A PROTECTIVE STYLE!"

$
0
0

by Yolanda Renee of Etcblogmag.com

Naturalistas, did you know there is a great debate going on about protective styling? What is a protective style to you? There is actually an argument out in the natural hair universe that if you wear weaves and wigs YOU ARE NOT NATURAL. Guess what, there is even an arguments that suggests, if you have color, use certain products, or straighten your hair YOU ARE NOT NATURAL. Before we move on let's dissect the meaning of a PROTECTIVE STYLE. We of course are going to use the definition from CurlyNikki's website:

"...protective styling is basically putting your hair into a style that involves tucking your ends away from the atmosphere to protect them from damage..."

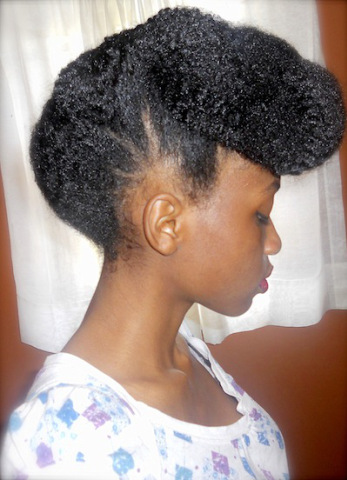
More traditional protective styles include braids, twists, cornrows, roll, tuck & pin, buns (debatable also LOL); as well as low manipulation styles such as twist outs, braid outs, and wash n gos. Here recently naturalistas have also been rocking natural hair inspired protective styles such as poetic justice braids, box braid, marley twists, havana twists, faux locs, wigs, and weaves. Once these styles started trending is when the great debate really went full force.

Read On!>>>


Remember the documentary with Chris Rock, "Good Hair"? Someone (clears throat, Nikki Walton) really needs to have a follow up interview with him because I remember him making fun of beauty supply stores not selling African textured weaves. And look at us now! There are so many natural textured extension companies out there taking over the hair industry. Companies like Private Stock Hair, Kinky Curly Yaki, Heat Free Hair, Curlkalon, and so many more.

I don't know if I can be personal on this article but I have my own signature wig, FROSACE with Private Stock Hair. FROSACE is so bomb! We created her to mimic my signature heart shape fro. I also recently worked with RPG Show who allowed me to review their curly unit. Both mimic african american textured hair so well. I'm having so much fun with a new look. I feel like I have the best of both worlds...have the convenience of a wig and I'm still promoting the beauty of our unique texture. Does this make me "unNatural"?

In conclusion, those who choose to wear weaves, wigs, faux locs, box braids, etc. it is ok to rock such styles. You are promoting the beauty of our textures and unique styles. It is only problematic when you are not comfortable going back to your true natural state. If you only feel beautiful while wearing weaves and wigs there may be a deeper rooted issue. Handle that! And its ok to admit that...its taken us so long to get to this point of loving our natural hair. We still have a lot of work to do. That's what the natural hair community should be...a place to promote the beauty of natural hair as well as to uplift one another to get that unconditional love of our strands!


What do you think? Are protective styles such as weaves and wig setting the natural hair movement back?

I Big Chopped- Latoya from Kentucky

$
0
0

Tell me about yourself!
My name is Latoya. I am 30 years old. I reside in Kentucky with my daughter and boyfriend. Lover of all natural products and hair.

Were you a transitioner or a Big Chopper? What was your journey like?
I transitioned a few times before, but always ended up relaxing my hair. Frustrated and not knowing how to manage the two different textures I ultimately just gave up. It wasn’t until 2012 that I decided it was time, I just walked into a salon and had all but 2 inches cut off. I was practically bald so during that phase I played a lot with wigs and hair extensions until I had some length.

READ MORE>>


Had you always embraced your texture?
Absolutely not. I used to straighten/relax my hair religiously because that’s what I thought was acceptable and it was easier to manage. At the time, I'd hardly ever seen women embracing their natural hair like I do now. But now that it’s in its natural state, I’m constanly wishing it was curlier.

How did family and friends react to your decision to go natural? What was your response to them? 
My family wasn’t as supportive as I would’ve liked them to be. At first I’d hear constantly “put a relaxer in your hair” and some would say "I give you a couple months and you’ll go back to relaxing." WRONG. During the transition my mom even decided to go natural.

Describe your hair (fine or coarse, thin or thick, highly porous, low, etc.)
It’s thick and I guess because  I have different textures all through my hair. The back is a lot curlier and softer. The front and middle is so kinky and tends to get dry and it’s prone to frizziness. I’m still trying to find what works for me.


What’s the craziest thing you’ve ever done to your hair? 
Bleaching my hair. OMG. It caused so much damage to my hair.

What’s your biggest hair related regret?
Getting a relaxer period. More so doing them myself at home because I damaged my hair so much. Then not getting trims like I should have because I wanted length.

What's your current hair routine? How often do you wash, condition, and style? Favorite products! Deets!
Water. Water. It’s a must during the summer. I did a lot of wash n gos. I’d wet my hair then apply a leave in and creme (As I Am) which is amazing. I can’t tell you how much money I spent on hair products. Just because it works for one doesn’t mean it will for you. There was a lot trial and error when finding what works for me.. However now that the weather has changed its colder so I’ve had to change my routine I moisturize more and wash less. I deep condition with a heat source for at least 30 minutes every 2 weeks and avoid using blow dryers and any heating appliances.


What’s your favorite hairstyle? Where do you get hairstyle inspiration?
My favorite is a wash and go, because it’s so easy and always looks good. My second favorite is the Puff when I don’t feel like doing much or anything to my hair. Really all about little to no manipulation to the hair.

Who is your curl crush? 
Taren Guy. Love her hair it’s huge and absolutely gorgeous.

How do you maintain your hair at night?
At night, I wear a bonnet.

How do you maintain healthy length?
For starters I don’t dry comb my hair, honestly I don’t comb my hair at all. I usually detangle while in the shower with my fingers and use lots of conditioner. I always allow my hair to dry naturally.


What's the best thing about being natural?
The versatility. And knowing my hair is healthy.

Where can folks find you on the web?
Instagram: lala.tee
Snap: toyaaal

You are Fully Capable of Pleasing Yourself.

$
0
0


I was old enough to feel like a woman but young enough to be shy about it. I used to sit in my bedroom in front of the mirror pretending someone was watching me. Usually that someone was my crush of the moment or someone I wished would notice me.

Read On!>>>
This was my time to indulge the part of me that wanted to be seen and appreciated as a woman. I’d go about my beauty routines lavishly applying lotions and enjoying the softness of my skin, making eyes at myself. I’d have pretend conversations, smiling and flirting with some imaginary person, driving them crazy with my charm and mystery. Inevitably, at some point I’d turn on music and the private dancing would begin. Behind my closed bedroom door, I was a goddess, completely immersed in my own feminine energy.

While I would have been embarrassed to talk about these antics at the time, I realize now that this kind of indulgence is sacred and it’s incredibly self-soothing. Over time, I got away from myself and started relying on men for everything. To make me feel sexy, happy, interesting, appreciated, whole. There were times I literally begged men to make me feel important, to fix me when I felt broken and rescue me. I forgot how to appreciate my own attention and it took me a long time to return to myself.

I’ve been thinking a lot lately about the imagination of self-love and how healthy it is to be entertained by yourself. We need to explore all our layers and inspire ourselves and make stuff and dream. When we crave attention, we need to know how to feed that desire with our own details and the sustenance of our own care. So we don’t rely on others to give us what we should first give ourselves.

There is an undeniable connection between imagination and purpose. Whatever it is you find yourself visualizing and needing to express, there is a reason. However many women live inside of you, your imagination can reveal them. Don’t be inhibited with yourself.

I purposely remind myself daily that I am a sensual being, fully capable of pleasing myself. I take time to notice how I touch things and how I move. How I take care of myself and what makes me feel stimulated and alive. How I surround myself with inspiration. No matter what I’m doing, I enjoy my own company. I’m not waiting for someone to see me or fill me, I know how to do it on my own.

When we don’t give ourselves this attention, we can find ourselves doing unhealthy things to get some light from someone else. And oh my God, the things we do, the things we put ourselves through, rather than cultivating what we need to feed ourselves. Start there, in your own space, with an admitted desire for love and attention. Don’t be ashamed of it. Use your imagination to channel your magic and inhabit yourself fully.

How to Get Super Straight Natural Hair Using the Silk Wrap Method

$
0
0


by Sabrina Perkins of SeriouslyNatural.org

The original purpose of silk wrapping was to give relaxed hair that ‘flat ironed and silky’ look without excessive heat abuse.  This treatment involves applying a bit of moisturizer and shine spray to the hair before wrapping it, securing with saran wrap and sitting under the hooded dryer for a spell.

Somewhere down the line, though, someone got it in their mind to try this technique on heat styled, natural hair.  It works great for natural hair that has been roller set, blown out, pressed and/or flat ironed. The silk wrap serves the same purpose, with the added benefit of reducing the volume of the hair for a ‘flatter’ look.

If you're looking to extend the time between blow-outs and want to switch things up with a super sleek look, then this might be a great tip to try!

Read On!>>>
How to silk wrap natural hair:

Start on dry hair. If relaxed, you should have roller set first, if natural, follow your usual process of straightening your hair (large magnetic roller set, blow out, flat iron, etc).

• Take a dime sized amount of your moisturizer (preferably something light), emulsify in your hands and then apply to hair concentrating on the ends. Use a comb to smooth through your strands.
• Brush your hair into a smooth wrap trying not to use any pins as they will create creases in the finished look. If desired, spray your hair lightly with an oil sheen spray.
• Apply the saran wrap (cling film) over the hair quite firmly ensuring you cover the top of your head as well.
• Sit under a moderate to hot dryer for 10-20 minutes
• Remove the saran wrap and comb out the wrap.
• Silky smooth locks are yours!

If done correctly, your natural hair will not only not revert, but the hair will be smoother!  Check out Classcie's tutorial--


Have you ever tried a silk wrap? Please share your results!

Preparing Your Natural Hair For Braid or Twist Extensions

$
0
0

Braid extensions have been around since forever and many women have used them over the years as protective styles to grow longer, stronger hair. But for every one women who reaches her hair goals with braids, there are several more who experience damage and breakage from this style. To avoid making the common mistakes many women do when wearing braids, read on for helpful tips to ensure that you get the most out of this style.

Read On!>>>

Strengthen and Moisturize Your Hair
Before even considering installing braid extensions, you have to ensure that your hair and scalp are strong enough to handle the extra weight and tension of the braids. To prepare your hair for braids, I would suggest doing a strong protein treatment followed by a moisturizing one at least twice before event thinking about braiding your hair.

Also, try to solve any scalp issues you might have that may be weakening your hair. For instance, try to focus on curing dandruff, dry itchy scalp, any fungal infections, etc.


Tips for Properly Installed Braids
Properly installed braids are the key to maximizing your hair growth. Failure to install your braids correctly can do more harm than good, and leave you with breakage and thinning hair. Here are some guidelines to follow when installing your braid extensions:
  1. Parts should be smaller than half an inch by half an inch. By creating smaller parts less hair is being incorporated into each braid. This means that fewer strands will have to bear the weight of the added hair creating more tension than if a larger part was created and more hair was used.
  2. Braids should never be bigger than the part. In order to achieve a fuller look and hide some of the parts you may be tempted to use a lot of hair per section to braid. The problem with doing this is that you are forcing only a few strands of hair to bear a lot more weight than they are accustomed to. This could cause the strands to snap from tension created. See the guide below for further detail.
  3. Do not try to braid all of your edges. The edges of your hair are very weak and fragile and susceptible to breakage. Most people experience breakage from doing everyday things like brushing their edges and wearing too many back to back ponytails, so you can only imagine the breakage that can be caused by braiding the edges tightly and leaving that tension on it for a prolonged period of time. Try to use larger sections when braiding the front to distribute some of the tension throughout more hair strands. Also, avoid braiding the very front of the hair. Try leaving out the very front and simply applying a pomade and a scarf for ten minutes to smooth it down.
  4. Use less hair near your edges to avoid adding too much extra weight and try to redo them whenever they get loose to prevent tension from remaining on the same region of the hair shaft continuously.
  5. Ensure braids are not too tight. Contrary to popular belief tighter braids will not increase hair growth. The tightness, apart from causing damage, can lead to tension headaches and unsightly bumbs and sores.


Maintenance & Cleansing
There are many ways out there to wash braid extensions. I find that the most effective way is to split the hair into four sections, then using watered down shampoo and your fingers, apply the shampoo to the scalp and rub gently to lift the dirt off of the scalp. If you have a lot of product buildup from using greases, oils and growth aids then the use of a soft and small baby toothbrush can help. Just ensure that you do not rub too hard.
  1. Once the dirt has been lifted off the scalp, band your four sections of hair to ensure that the braids remain in a downright position and do not mat during the washing process. Take more diluted shampoo and pour it over your head and squeeze sections of your braids to ensure that the shampoo penetrates the braids and cleanses the hair inside. Once done run your head under the water until it rinses clean ensuring your hair is still banded to avoid tangling.
  2. You can now apply your deep conditioner, then conditioner, avoiding your scalp to prevent build up and squeezing the hair to ensure that it penetrates the braids. Rinse really well as conditioners and deep conditioners tend the be thick and could cause build up which can make removing the braids and detangling the hair once they are out difficult.
  3. Keep braids banded until they about about 50 percent dry, then remove then bands and gently finger detangle if you have loose ends. Removing the bands before the hair is completely dry will prevent your hair from drying with the shape of the bands in them.
Moisturize Regularly
It is important to remember that you still have hair underneath your braids that require TLC. The same way you moisturized your hair when it was loose, you need to ensure that your hair is moisturized while in braids. In fact, your hair may need more moisture as the braided hair can absorb some of the moisture from the hair. To ensure that your tresses do not become thirsty, use a liquid moisturizer or braid spray twice daily, spraying it on liberally. A liquid moisturizer is best as it can penetrate the braids and get to your actual hair better rather than simply sitting on top and will help to prevent build up on your braids, especially at the root.

Also this is a good time to keep your scalp happy with oils.

Uninstall Braid Extensions
The procedure used for removing braid extensions is just as important as the one used for installing them. The right technique is key to ensure that you hold on to as much your new growth as possible. To help to make the hair more slippery and pliable, try using a water, conditioner and oil mix to unravel the braids. Once it is out, detangle that section of hair right away rather than trying to tackle one large section. Do not run a comb through it, simply remove any residue at the base and gently pull the hair apart.

Also keep in mind that a lot of hair shedding is normal. It is estimated that we shed about 100 hairs per day, so if your hair has been braided for a prolonged period then that shed hair is only now being removed from your hair.

Lastly, to prevent a nightmare of a detangling session, do not leave braids in your hair for more than 2 months, and even that is pushing it. You will end up losing more hair to tangles and knots than you will gain in hair growth.

This article was originally published in February 2012 and has been updated for grammar and clarity.

Do you use braids and twists as protective styles? How do you prepare your hair for them?

How to Build A Natural Hair Care Regimen With Only 4 Products

$
0
0
Once you transition to the world of natural hair care things can be quite overwhelming. Product recommendations, styling tutorials and diy recipes that promise growth are flying at you left and right. Each blogger has specific things she does for her hair and what works for her texture but you just want to know where to start without breaking the bank. And honestly you’re trying your best not to give up but you are also two minutes away from the creamy crack! Lucky for you, I like to keep things simple. At the core of every healthy natural hair journey is a basic natural hair care regimen. If you don’t want to become a kitchen chemist and mix essential oils, eggs, mayo or whatever else you have read you do not have to. Here’s the breakdown of how to build a no-nonsense healthy natural hair care regimen.

Read On! >>>
4 Steps to a Natural Hair Regimen

At the core you need 4 types of products for your natural hair care regimen, tops. Also, remember products are formulated to work best together so you can save time and money by purchasing each product from the same brand.

1.Cleanser
2. Conditioner
3. Daily Moisturizer
4. Sealer and/or Styler

There are variations of each product type but at the end of the day the choice is yours. Let’s break these products down a little more:

1. Cleanser
-1 Moisturizing Shampoo (weekly)
-1 Clarifying Shampoo (monthly)
-1 Co-wash (optional)

The foundation of natural hair care starts with clean hair as clean hair will ultimately become healthy hair. Use a hydrating sulfate free shampoo to cleanse with lukewarm water weekly and use a clarifying shampoo once a month depending on your level of product build up. Clarifying shampoos have a higher pH level to gently open the hair cuticle and remove dirt, build-up and environmental elements and are greatly needed to ensure a healthy scalp.

My Product favorites – Obia Natural Shampoo Bars– great for moisture and detangling. For clarifying the Hydratherma Naturals Herbal Amino Clarifying Shampoo works wonders with removing product buildup after a long month of styling with butters and heavy creams. Co-washing is optional but can be completed every 2-3 days. If I choose to co-wash the Eden Body Works Cleansing Co-wash is hands down the best.

2. Conditioner
-1 Deep Conditioner (weekly depending on dryness)
-1 Leave-In Conditioner (each time you shampoo & daily if needed)

Use a hooded dryer, steamer, warm towel or hair therapy wrap for 20-30 minutes to deep condition. The use of mild heat helps further open the hair cuticle to moisturize. For extremely dry textures once a week is suggested; otherwise, 2 times a month is optimal. Use a product that explicitly states DEEP conditioner or masque/mask. There is a difference between regular conditioners and deep conditioners. They are not the same and are not intended to serve the same purpose.

One step you can’t afford to miss is the leave in conditioner. Leave in conditioners are intentionally the final step in your shampoo & condition process because it usually has the lowest ph balance to close the hair cuticle to retain moisture.

My Product favorites: I always get great results using the Mielle Organics Babassu & Mint Deep conditioner. This one contains protein so if you’re protein sensitive opt for the tgin Honey Miracle Mask Deep Conditioner. In a given month I rotate between both for optional protein/moisture balance. For leave in conditioners, you also can’t go wrong with the Obia Natural Hair Curl Moisture Cream or the Karen’s Body Beautiful Sweet Ambrosia Leave-In Conditioner.

3. Moisturizers (Daily)
I seriously can’t stress this enough…moisturize, moisturize, moisturize! Natural hair care is all about making sure those curls are soft and hydrated. This is the #1 issue among women with natural hair because we are not moisturizing properly, we are not enough. It’s ok to moisturize your hair every day and this is the first thing I encourage when women complain about severe dry hair issues. Note: Moisturizing is not shampooing, co-washing or oiling your hair every day. At the core, moisturizing is using water based products to refresh your natural curls daily. Opt for a moisturizing hair milk or daily refresher spray.

My Products favorites: Plain & simple h2O and a little oil mixed in a spray bottle. A light spritz at night before bed and again in the morning will ensure your hair stays moisturized throughout the day. Your daily moisturizer can also be a leave-in conditioner of your choice, which in some cases may work as a styler too! Perfect right?

4. Sealer and/or Styler (Each time you style)
Once you have moisturized the hair by deep conditioning and applying leave in conditioner, seal moisture with natural oils such as castor oil, jojoba oil, or shea butter based products to retain moisture. Test different oils to see which ones work best for your texture. Castor oil or shea butter may appear too heavy if you have a fine texture. Lighter oils such as almond, avocado, or jojoba might work better. Regularly moisturized hair will reduce breakage and will help with retaining length. If your hair is constantly dry, your risk of breakage increases. As a result, the hair can break off at the same rate it grows.

Product favorites: Camille Rose Naturals Aloe Whipped Butter Gel,Alikay Naturals Moisture Rich Hair Parfait, Bee Mine Organics Bee Hold Curly Butter
Your choice of styler such as a twisting cream could also work as your sealer, but pay attention to ingredients. My best results for longer moisturized hair are creams that contain aloe vera juice, mango butter, shea butter and/or avocado oil, just to name a few. Although these ingredients seem heavy, when produced into a creamy styler my hair can remain moisturized for up to 3 days.

What are your 4 staples?!

The Natural Hair Loss Remedy You Have to Try!

$
0
0


by Emilia Obiekea of AdoreBotanicals.com

Pumpkin Seed Oil (PSO) is a delicate ingredient that doesn't get much time to shine. It is a rich green color. The oil contains natural antioxidants, protein, omega 6 fatty acids, vitamins A, B, K, sulfur and zinc. PSO naturally blocks dihydrotestosterone (DHT). DHT is the hormone that causes hair loss and typical male/female pattern baldness. It is also a recommended oil to use for those that suffer from alopecia. For more info on DHT check out this article.

Pumpkin Seed Oil Benefits
-Boost hair growth
-Protects hair follicles
-Aids in cell regeneration
-Deters dandruff
-Maintains scalp sebum (oil) production
-Increases overall sheen of the hair
-Anti-inflammatory
-Very emollient

What's not to love about this powerful oil, right?! Alone, it's wonderful for hair growth, but when added to my favorite oils... that's what makes it a hair health titan!

Check it out below>>>
PSO Hair Treatment

This treatment is good for natural and transitioning hair:

Ingredients
-4 tablespoons of pumpkin seed oil (PSO)
-3 tablespoons of amla oil (coconut oil based)
-3 tablespoons of extra virgin olive oil

Application
-Using a funnel, pour all ingredients into a dye applicator bottle. Shake well.
-Place the dye applicator bottle into warm water. Once the coconut oil is melted it is warm enough to use.
Caution: Be sure to test it on your wrist prior to applying the oil to your scalp. Do want to burn yourself.
-Apply to the scalp, length and ends of your hair. Massage the scalp with the pads of your fingers for a minute or two.
-Wrap the hair up and cover it with a disposable shower cap and turban. This will hold your body heat and let the oils fully penetrate your hair and scalp.
-Then rinse, cleanse and condition your hair as normal.

Results
-You'll notice an immediate difference in your hair with each use. Doing this treatment regularly with scalp massages is great for hair growth. This oil blend can be used as a prepoo, weekly scalp oil treatment, added to your deep conditioner to enhance it and many more ways. Give it a try and share your results.

Tip: Eating pumpkin seeds is highly beneficial for hair growth. They can be eaten raw or roasted. Remember healthy hair starts from the inside out.

Do you use pumpkin seed oil?

SHOW AND TELL- FIERCE FRIDAY!

$
0
0
Hola Chicas!

For those of you that are new to CN, Fierce Friday is a way to celebrate our natural hair, displaying our dopest styles and best hair days... for inspiration and motivation. Wanna be featured? All you have to do is upload your favorite pics to Instagram with the tags #FierceFriday and #CurlyNikki. Be sure to share a brief description of the style, where you were headed, why you felt amazing, etc.!

Photo 📷: @flashme_photography_inc MUA💄: @lybartistryofficial #natural #teamnatural #curlynikki #bglh #afropunk #naturally #kinkyhair #afrohair @jennymchristian

 READ MORE>>

When your #puff can hardly fit in a #selfie #nhdaily #naturallyshesdope #kinkychicks #naturalhair #teamnatural_ @sdw8029

Hey Party People! Today's face! Fresh haircut!! I love when I feel that breeze on my scalp! #teamnatural #curlykinky @nikkagabridan


Crocheted Hot Water set. Done in 1.5hrs! It's gorgeous lady!...#yourhairiseverything #naturalworkshair #naturalworkshaircareproducts #crochetbraids #blackhairstyles @naturalworkshair


Filmed a (hair) video for this look on my new YouTube Channel😊 Hopefully I will have it up by the weekend!!! @amia_renee


Tapered cut on natural hair! Book your appointment today (225) 588-7777 #hairdesignsbybrandy #truebeauty #beautybydesign #naturalhair #naturallybeautiful #curlyhair @truebeauty_salon


Day 2 #Braidout #hairstyle #naturalhair #nomakeup #nofilter . For details, go to http://katch.me/sawahtwit #beauty #naturalhair #Nigerian @discoveringnatural


Follow your dreams.#teamnatural_ #curlynikki #health_hair_journey #myhaircrush #curlygal #naturalhair  @frankie_monroe


Me my Marley coffee 'One Love'❤️👄❤️ #marleycoffee #curlsandcoffeecups #odiva #coffeebreak #onelove @killabee069

So, 4 Things...

$
0
0

#OPI #LincolnParkAfterDark #NaturalNails

Hola Chicas, 

Checking in on this lovely Saturday morn...

1.  So I got my nails did yesterday... thought I'd switch it up. They look black in most lighting conditions and between the vampy color and the weapon-like shape, Dr. Daddy is officially creeped the hell out.

2. 
#PrettyPleaseWithCoconutOilOnTop #ForSeriousTho 

I've reached that critical stage in my routine wherein if I don't wash it next week, my 'natural hair blogger' card may be permanently revoked. #Eh

3.   I have to take Boogie to a party today. Anyone else hate going to other kids' birthday parties?  There's one like every weekend... I go because I want them to come to hers.  #Turrible #NikLoveDaKids #NotTrynaPartyTho


4. So my sister turned 29 today, and while I'm clearly not in MN to help her tear shit down, we will most certainly turn up in the most epic of ways in May for that thurr Bachelorette party!  #GoBestFriend #ThatsMyBestFriend #YouBetta 


Later Gators,
Nik

What you on this weekend?

Considering Sisterlocks? Read This First.

$
0
0

by Patrice Tartt

I’ve had an affinity for locs for many years, and after going from having long hair the majority of my life, to cutting my hair into a short cut, to growing it back out, I decided that it was time to try something different. I no longer wanted to “be bothered” with my hair on a daily basis, and constantly have to make the decision on what to do next. Trust me, it took a lot of research on my behalf to first decide if traditional locs or Sisterlocks would be best for me, and if I should even get my hair locked at all. One of the many deciding factors for most is the cost and time commitment of Sisterlocks. Oh, it’s no secret at all that Sisterlocks can be very costly and that the install can take days to complete. From the price for installation to having to get your hair retightened anywhere from every 4 to 6 weeks, this can be a turnoff for some. However, for me I wanted to be happy and satisfied with whatever decision that I was going to make about my hair, so initially I didn’t let the cost or time deter me from moving forward. Especially when this decision would be rather permanent for the most part.

Read On!>>>


I did my due diligence of effectively researching various Certified Sisterlocks Consultants, making an appointment for tester locks and then waiting to see how my hair would respond. After having the tester locks installed, I became apprehensive about continuing to move forward. I decided to cancel the appointment for the install that I booked with the consultant because just the thought of it being a lifestyle change for me started to scare me a bit. After a while, the other drawback was the amount of time that it would take for me to get my Sisterlocks installed, due to the density of my hair, as well as the length. The thought of this alone made me want to RUN, and never entertain Sisterlocks again.
It wasn’t until May of 2015 that I decided to set all of my fears to the side about getting my hair locked, and just do it! I actually lucked up too. I found an amazing consultant who happens to come to her clients. So she came to my home to do my install which made my experience very comfortable. After an entire weekend, of breaks of course, 26 hours and 421 locks later, my babies were finally installed! Whew, let’s just say that it was intense and if I had to do it all over again, would I? I definitely would. I’ve had my Sisterlocks almost 9 months now and I LOVE THEM! This is truly the best hair decision that I have ever made. Every day when I wake up, I simply run my fingers through my hair and go, unless I decide to do a style with my hair.

As you know by now, Sisterlocks are a lifestyle change and a true commitment. Here are some facts that you should know before you decide to free yourself of hair dilemmas, hair woes, and just bad hair days. Once you get Sisterlocks I promise you that bad hair days are non-existent!


1. Sisterlocks are not cheap. The prices can vary based upon a number of factors. Where I’m located the prices start around $500 and go up from there for the install. Typically a consultant can charge per inch after a certain amount of inches. They can also charge extra for density. For the retightening, this can be costly too and depend on the frequency of your “retight/retie”. So my suggestion is to definitely shop around and find someone who you are extremely comfortable with. Now, I’ll be honest, my amazing consultant did not charge me anywhere close to what everyone else charges. My retightening appointments are extremely reasonable too.

2.  Do your research. Be sure to check out Sisterlocks.com to ensure that you are only selecting individuals who are CERTIFIED. Their official title is Certified Sisterlocks Consultants. If their name does not appear on that list, I would keep it moving!

3.  ALWAYS, always, always ask to see their work. Request pictures of the installs that they have done. Just because they are Certified Sisterlocks Consultants is only half of the battle. You want to ensure that their work is satisfactory to you. In addition to this I would also do reference checks with their current clients.

4. Understand that this is a lifestyle change. Currently you are used to combs, brushes, flat irons, and curling irons. Well kiss all of that goodbye! You will no longer be using or needing those tools. You also will not be able to use any hair products on your hair as it is not recommended while your locks mature. The best products to use are those from the sisterlocks.com website. So pack up a bag of any hair products that you still have left and give them to a good friend who can use them.

5. Shampooing your hair will be slightly different. There is a special technique to washing your hair as you won’t wash the same way as you are used to. If you decide to move forward with getting your Sisterlocks, which I hope that you do, your Certified Sisterlocks Consultant will demonstrate how to do this. Don’t get me wrong, it’s not totally different from how you currently wash, however you will become very familiar with the term “bundling”.

6. Last but not least, embrace the journey. You HAVE to be patient and understand that everyone’s journey will be different. Your hair may go through a few changes and you may deal with a term called slippage or frizz depending on the texture of your hair, but know that your consultant is along for the ride and is committed to the success of your Sisterlocks. They should be just as excited as you are.

If you decide to move forward, you will not regret your decision. For me and for the thousands of other Sisterlocked sistas across the globe, we truly LOVE our hair.

Sisterlocks have been around for a very long time. In fact, this trademarked company was founded in 1993 by Dr. JoAnne Cornwell.

Have you rocked sisterlocks? Currently rocking 'em? Share your experiences below!

Natural Hair Styles: New Look for a New Year!

$
0
0

 by Ariane of BlackNaps.org

Maybe 2016 is the year you finally go natural. Maybe it’s the year you make the conscious effort to grow your hair healthy, instead of just long. Or maybe you just want a new look for a new year. No matter your reason, a new hairstyle can be a great way to kick off a new year.

The “new you” can be achieved as easily as changing your hair.

Whether you are looking to add volume or length, experiment with color or make a drastic cut, here are four ways to change your look for the new year!

Read On!>>>

source: pinterest

Get a Sew-in!
You used to have to go straight (or wavy) if you wanted extensions. But now you can get natural hair extensions to perfectly match your curl pattern. You can commit to a sew-in for a longer term protective style or clip-ins for a fun night out or date look. Best of all, with natural hair extensions, you can blend your leave out without using heat or use a natural closure that will make your style look flawless. Extensions are also great for transitioners who want to ease into natural hair styling or naturals who want to safely experiment with different styles without damaging their hair.

source: facebook
Get a Dope Cut!
Ok, so maybe you don’t want to add hair, but instead, you want to remove some. Now is a great time for you to do the big chop or get that trim (or a bit more) you desperately need. Either way, a cut is definitely a way to easily change your look. And it doesn’t have to be a sign that your life is going terribly wrong! Refresh your style with a cut that frames your face or makes your hair look healthier (and sometimes even fuller) with a Devacut. Let go of those dead, split ends and those straggling straight ends that are holding you back.

source:my natural sisters ig
Try Crochet Braids
For those with more time than money, crochet braids are DIY and cost effective alternative to bundles. You (plus a friend or two) can easily knockout crochet braids in a couple of hours. Depending on the type of hair, you can get an afro or twist out style or heat set the hair into a wand curled style. Crochet braids are also a great way to experiment with color. For $5 a pack you can try the deep purple or fiery red you’ve been wanting to try without dyeing your own hair or extensions.


Source: Savannahhperkinss Instagram

Faux Locs for the Win! 
For the edgy girls or those looking to start locs, you can again ease into the style with faux locs. This protective style is again something you (or your friends) can easily install. You can get the look of long luscious locs without having to grow and maintain them for years. If you’re normally a braid or twists girl, this is a perfect way to subtly change your look. And of course if want to start real locs, installing faux locs just might be that push you need in the new year.

How are you planning on changing up your hair in the new year?

Autumn is Naturally Glam!

$
0
0


Tell me about yourself!
My name is Autumn. I’m 20 years old, I am a Christian, and I am from Chicago.

Have you always embraced your texture?
Nope. I relaxed, flat ironed, and hot combed my hair the first 15 years of my life, and even then I did not like my texture. I had always found it difficult.

READ MORE>>


Were you a transitioner or a Big Chopper? What was your journey like?
I was a transitioner. Freshman year of high school (2010) I was required to take swimming class every day for Physical Education, and after a few days of swim-cap-struggles I thought, “Hey, straight haired girls can just hop out of the pool and wash their hair; why can’t I do the same?” Then I began to research natural hair. I found videos on YouTube of BeautifulBrownBabydoll, Taren916, Naptural85, and Mahoganycurls, and I fell in love with natural hair. I saw that I did not have to straighten my hair for it to be beautiful, and I decided that I would not be getting a relaxer again. I gradually saw my kinky-curls emerge.

How did family and friends react to your decision to go natural? What was your response to them? 
I began showing some of the videos and pictures I’d been finding to my sisters and my mom, and I think they liked them too. They saw me wearing two strand twists, twistouts, braids, braidouts…etc. and pretty soon, they stopped straightening their hair as well. My friends were very supportive. They’d always compliment me on how cute my twists were, or how thick my hair was getting.


Describe your hair (fine or coarse, thin or thick, highly porous, low, etc.)
My hair is a mix of fine and course strands, it is thick, and I believe it has a lowish-normal porosity. My curls/kinks are small (they range from bendy straw to tea stirrer in diameter, but they are not zigzags).

What’s the craziest thing you’ve ever done to your hair? 
Disclaimer-This will probably be more embarrassing than crazy:
Upon leaving the swimming locker-room one day I had resolved to just wear my damp half relaxed, half natural hair down-and-out the rest of that day (I had forgotten my comb, I lost my ponytail holder in the pool, and I hadn’t had time to look in the mirror), but when I got to my next class I realized that it was picture day. I took the picture. I hoped for the best. I looked a hot mess… but I was smiling. I was also one of the top ten students in my class, so that lovely photo graced the main hall of my high school for an entire year (but I always had a nice laugh about it).


What’s your biggest hair related regret?
I regret how many years I spent being ashamed of it, instead of thanking the Lord for it. My hair is unique. It is a gift, an extension of my personality, a wonderful teacher of patience and gentleness, and my crown.

What's your current hair routine? How often do you wash, condition, and style? Favorite products! Deets!
I wash and style my hair (about) every three days.
1)I saturate my hair with very warm filtered water in the shower.
2)I separate my hair into four sections and clamp each one out of the way.
3)I wash the scalp of a back section using a Shea Moisture shampoo (Curl & Shine), scrubbing my scalp with one shampooed hand and holding the ends of my hair together with the other hand. Rinse. Repeat. Rinse.
4)I use V05 Strawberries and cream and/or Trader Joe’s Tea Tree Tingle Conditioner(s). Don’t rinse. Clamp the section up and carry out the shampooing and conditioning on the other three sections of hair. And clamp them all up.
5)Shower (my body).
6)Turn the water to cool, and rinse out every section of hair (one at a time) and clamp back up.
7)Turn the water to super-cool and do a final rinse of the clamped hair.
8)Dry hair by squeezing each section firmly with a big cotton T-Shirt.
9)Apply virgin coconut oil from roots to ends.
10)Style hair with fingers.
Every other week my second-to-final rinse will be an organic apple cider vinegar one (2-3 tbsp per 2 cups of cold water), which I leave on my hair for 3 minutes, then rinse with cold water.

What’s your favorite hairstyle? Where do you get hairstyle inspiration?
My favorite style is down-and-out because it naturally dries into a kinky-fro, and I’m happy I finally have the confidence to wear it. Pinterest pics, YouTube videos, and a want for low maintenance styling inspire me.

Who is your curl crush?
I have a few: Razorempress, FrogirlGinny, and MinimalistBeauty (Dawn Michelle).

How do you maintain your hair at night?
I pineapple it, and wrap it with a satin scarf (or bonnet).

How do you maintain healthy length?
I only finger-comb (and in the shower), and I just try to be gentle and not play in my hair too much throughout the day.

What's the best thing about being natural?
Learning to embrace this beautiful and unique God-given part of me.

Where can folks find you on the web?
 I am Autumn WWJD Bolling on FB.

How to Use a Curling Wand On Natural Hair

$
0
0

Hola Chicas!

Check out Bianca Alexa's simple, wand curl tutorial.  It's a great way to style natural hair of any length when you're looking to switch up your look for a spell. With the proper precautions, you can avoid heat damage and enjoy big, luscious curls.  Interested in how you can preserve your wand curls at night?  Try the modified pineapple wherein you bend over at the waist, allowing your hair to gather at your crown, and then don your satin bonnet, stuffing your curls underneath.  When you take the bonnet off the next morning, your curls will be just as bouncy and as full of life as they were the day before! Enjoy!


have you tried wand curls? share your experiences below!

The Secret to Natural Hair Moisture Retention

$
0
0
jessica pettway!

by Sabrina Perkins of SeriouslyNatural.com

There's a lot of information out there about the importance of the hair's cuticle and keeping it closed and smooth.  However, it's important to note that you first actually want to open it to allow in the moisture and nourishment!  This article will share details on the structure of the hair, and how to open and close the cuticle to retain proper moisture levels for healthy natural hair care.  A smooth, closed cuticle really is the secret to stronger, healthier hair.

Read On!>>>


Parts of the hair
It is essential to know the parts of the hair to properly understand what it is and what it needs to stay healthy. There are three main parts of the hair:

-Root (part growing in the follicle),
-Shaft (middle of the length of the hair)
-Tip (the end of the hair farthest away from the root).

There are also three layers to hair:

Medulla (innermost layer of the hair)
Cortex (between the cuticle and the medulla)
Cuticle (the outermost layer of the hair.

The cuticle is made of a tough protein called keratin and is really a series of overlapping scales.

The cuticle tends to be unorganized and overlapping like a roof shingle and these layers work defensively to prevent damage to the hair’s innermost structure while holding onto the water content of the hair fiber. The strongest hair has a smooth, closed cuticle because when the cuticle is raised or chipped it is extremely difficult to maintain hair’s moisture levels.

When the cuticle layer is open or raised, chemicals, ingredients, and water can pass through to the center of the hair strand and this is how you can add color or relax the hair by altering the cortex. Now, being able to open the cuticle is just as vital as being able to close it and while it is necessary or happens in everyday styling and care, the simple act of opening and closing is damaging to the strands.

What opens up the hair cuticle?
Potential of Hydrogen or pH is the measurement of how acidic or alkaline a substance is and is judged on a scale between 0 and 14. 0 to 6.9 is acidic with 7 being neutral and 7.1 to 14 is alkaline. Human hair is 4.5 or 5.5. A base or alkaline will open the hair’s cuticle and while chemicals like color and relaxers have ingredients that do open the cuticle simply adding water to moisturize your hair or some shampoos will also slightly swell and raise the hair’s cuticle too according to The Natural Haven.

This means even if you are trying your hardest to keep your cuticle intact that will be impossible as simply cleansing is raising the cuticle and a necessary component of healthy hair care. The problem lies when the cuticle is damaged and will not close and many who bleach or relax their hair suffer from this problem.

What closes up the hair cuticle?
The opposite of what opens up the hair’s cuticle is what closes it so that would be ingredients of an acidic nature like many DIYers favorite, ACV. Conditioners do exactly the same thing as they contain positively charged or cationic surfactants. The Natural Haven

A properly closed cuticle will contain the moisture that is in the hair shaft, seal it in allow for flexible, soft and more manageable strands. Many also believe that simply running cool or cold water on hair will close the cuticle but there is no evidence to support that claim. The Natural Haven

Also understand that the hair cuticle is not something as rudimentary as a door that one can open and close just as easily. It can be damaged and repaired and really no need for force to open it. Wetting the hair or using most shampoos will open it while conditioning and deep conditioning (which should be done after every wash) will close it after it has applied the necessary moisture. By washing, styling and dealing with the environment will cause damage to your hair.

This is inescapable so maintain the hair by cleansing, conditioning, deep conditioning, and protecting it from the elements, over-manipulation, heat, and chemicals. Do what you must and what you want but always be sure to care for it and if you are inflicting more damage than usual than think about protein treatments or a break from the damage.

Did you already know or was this something new to you naturals?

Achieving the Perfect Bantu Knot-Out: Wet or Dry Hair?

$
0
0

Hola Chicas,

Bantu Knots create the most gorgeous spiral effect when you release them... it gives you results unlike any twist or braid out. It's the perfect style because everyone can try it-- transitioners looking to blend textures, divas with straight hair and naturals of most lengths.

But the question is always the same...do you get the perfect bantu knot out on wet or dry hair?

Read More!!>>>

Bantu Knots on Dry Hair:


Here's a video from Alyssa Forever on how she styles her bantu knot outs with dry hair. She washes her hair first and then detangles it. She then gets her hair dry by blow drying it (after putting on a heat protectant, of course). This is up to you, you can always choose to air dry your hair rather than blow dry. But she swears by dry bantu knots, and putting as little product as possible. For Alyssa, the key to perfect dry bantu knots is ensuring that each twist is perfect. No tangles, knots or snags. Brush each strand of hair before you twist to make sure it's as smooth as possible.

Bantu Knots on Wet Hair: 


This is a video from CurlyKTwintyone. She likes to do her bantu knot outs on wet hair. She styles her hair with freshly co-washed, deep conditioned hair so it's nice and slippery. If her hair dries out during the process, she sprays it with a mixture of water and aloe vera gel. When she takes down, she separates with her fingers, and twirls the less defined more frizzy spots. The result? Super moisturized, defined fluffy coils.

Put to the Test 

4CHairChick and Evelyn from the Internets took this matter into their own hands and decided to test both. Evelyn preferred doing bantu knots on dry hair, which resulted in more defined, frizz free coils. 4cHairChick agreed that wet bantu knots look too separated, and not fluffy enough to her liking. She preferred dry bantu knots as well. Overall, wet bantu knots were too unpredictable and took too long to dry. Watch the episode here:


What CN Says About Bantu Knots: 

Do you create them on wet, damp or dry hair?
-Wet in the past, but damp would work MUCH better! They'd actually have a chance to dry.

Fav products?
-Conditioner and an oil or butter to seal the ends. Remember to go light with products as this style has a tendency to take forever and a day to dry.


Twirl and knot one strand, or do you create two strand twists?
-I create two strand twists, and then knot.


Bobby pins or tuck the ends?
-I tuck the ends, you'd be amazed at how well they hold!

Air dry or bonnet dryer?
-I air dry, but bonnet drying creates a smoother and longer lasting set in my opinion. Occasionally, if pressed for time, I'll bonnet dry for 30 minutes and allow it to air dry the rest of the way. 


Take down method?
-I carefully unravel them one at a time. Take down the twist and massage the roots to cover up any patchiness. I then separate and gently finger comb through the roots to fluff.

Maintenance routine?
-I sleep with my hair out on a satin pillow case.


Are you a knot-out queen?! If so, how do you achieve the perfect Bantu Knot-Out?!


Does "the tingle mean it's working", or nah? #PeppermintOil

$
0
0


"The tingle means it’s working.” Have you ever heard that before? Two tingling oils that are popular with curly girls are peppermint oil and tea tree oil, and while they both sound like great natural oils to use for hair and scalp what do we actually know about their tingling effects? Let’s first find out what they are and can do.

Read On!>>>


What is peppermint oil?
Peppermint oil is derived from the peppermint plant, which is a hybrid species of spearmint and water mint. It is historically used for medicinal purposes, it has a long history in even Chinese and Japanese folk medicine. Peppermint oil contains calcium, copper, folate, iron, magnesium, manganese and omega 3 fatty acids, vitamins A and C. It is also quite useful for headaches, muscle pains, allergic reactions, itchiness, scalp, and hair.

Peppermint oil has that cooling effect that most are aware of and with its antiseptic, regenerative and stimulating effects it is quite often sued in relieving scalp irritations like dryness and dandruff. Those stimulating effects make it popular with hair loss sufferers for increasing blood circulation to the scalp and creating a healthier environment for hair growth.

What is tea tree oil?
Extracted from the leaves of the tea tree or Melaleuca alternifolia. This oil is known as a cure all and I have used it for gum issues to dandruff so I am a believer in it. This natural oil is particularly effective against bacteria, fungus, and viruses and has antiseptic, antiviral, antibacterial, antimicrobial, stimulant, and cicatrisant properties. It is used for acne, toenail fungus, ringworms, psoriasis, and dandruff and can be used on small cuts.

Tea tree oil is excellent for hair and scalp namely for relieving dandruff. Before I was using the CGM, I had a dandruff problem and hated using medicated shampoos. I started adding a few drops of tea tree oil to my palm when using my regular shampoo. Tea tree oil also has stimulating properties, which help increase blood flow to the scalp and create a healthy environment for hair growth. Just like peppermint, it has that cooling or tingling feeling when used on the scalp and hair. It is one of the natural oils quite often used for removing lice and soothing dry flaking scalps.

Is the tingling stimulating or irritating?
According to American Board Certified haircolorist and hairstylist Monaé Everett:

“Peppermint and tea tree oils are highly concentrated essential oils and it is suggested that carrier oils are used to dilute them. If applied to the skin or scalp alone, the tingling sensation could be a sign of irritation. So test your level of sensitivity to the oils first. Otherwise, the tingling feeling these oils create when diluted properly is a result of the antiseptic and stimulating properties of the oils.”

It is not advised to use peppermint or tea tree oils without diluting it in a carrier oil or product such as conditioner, unless instructed by a physician or cosmetologist. These oils are highly concentrated and still effective when diluted with carrier oils or hair products, so using them alone is unnecessary. With peppermint oil and tea tree oil they are just as potent and advantageous in conjunction with oils and products.

Do you like hair products with a tingling sensation?

Natural Hair Salon: How to Choose the Perfect One for YOU!

$
0
0

L & Co Salon in Old Town Saginaw

by Charlene Walton of TexturedTalk.com

After talking about why natural hair salons should teach texture education, the first step for many women is actually finding a credible salon to attend. Finding the perfect natural hair salon or hair stylist can be a very daunting task. It can take months or even over a year to find the perfect match. And if you recently moved to a new city you may have no idea of the first steps to looking for a new stylist. Or maybe you are a new natural and your current stylist does not specialize in natural hair. Whatever the case, here are a few tips to finding the perfect natural hair salon.

Read On!>>>


How to Find the Perfect Natural Hair Salon

1. The Power of Hashtags
If you are one of those people easily annoyed by overly used hashtags, don’t be because it is truly a great resource. The power of hashtags is incredible. I have found several makeup artists and hair stylists simply by hashtag search via Instagram using #dallasstylist #dallassalon and so forth. However…you must also go the extra mile. Once you find a stylist and come across their page do not stop at the first beautiful picture you see. Keep investigating to get a trend of the type of hair service that stylist shares the most. Also, check to see the other hashtags used by the stylist, which usually gives a little more detail behind the actual hairstyle in the photo. Do you only see blowouts and silk presses? Does the person only specialize in weaves and sew-ins? Like it or not, social media is a walking marketing campaign for certain professionals. If there are limited pictures of the stylist offering natural hair services either walk away or go to step two…

2. Ask If the Salon or Stylist Offer Consultations
Let’s face it, going to a new stylist is just flat-out scary. You are trusting your crown and glory into the hands of a professional you barely know. To ease your fears, ask if the salon or stylist offer consultations, either in person or over the phone. Having the opportunity to clearly talk through the services you want, your past hair issues and your end expectations can save a lot of time and money. Also, by going into the salon you can get a sneak peak of current clients, the vibe of the salon and how the salon operates. This is always a plus!

3. Ask About Their Tools & Styling Process
Call me crazy but before trying a new stylist I have tons of questions about everything from the product line used to the brand of the styling tool. Those are all very important things to me and any natural hair salon that does not offer steam/hydration treatments for natural hair clients, I sort of give the side eye. You should be well equipped with information before sitting in the chair so there are no surprises. Additionally, knowing if a stylist uses a ceramic or titanium flat iron can be the difference in your curls experiencing heat damage depending on your texture. With ceramic flat irons, heat is not evenly distributed as with a titanium flat iron, causing the stylist to possibly pass the same section of hair over and over with the iron.

4. Traditional Reviews
Although we live in a social media driven world where pictures sell the story, traditional reviews still hold a ton of value. Exhaust all of your review resources from Yelp, Google Plus reviews, Style Seat and Facebook when looking for a natural hair salon. More importantly, this may be able to give you a more robust and in-depth review from a wide range of people. For example, there are thousands of women who do not post Instagram pictures, have a blog or create youtube videos for their reviews. Writing a traditional review is quick and to the point. Also, I often find people on Yelp do not hold back so you are pretty sure to get a very honest opinion.

Any other suggestions I may have missed? Share how you found your stylist and comment below!

A New (All Natural) Way to Prevent Split Ends!

$
0
0

Hola Chicas!

Is the cold winter weather wreaking havoc on your hair? Jungle Naps is sharing how she uses rose hydrosol to moisturize her hair and reduce split ends.

Rose hydrosol is made by steam distilling rose petals. The resulting condensation is a much gentler version of rose oil. It is can be applied directly to the scalp and hair shaft even on the most sensitive skin types. Its benefits include increased moisture, antimicrobial properties, and less split ends that result from dry, brittle hair. As an added bonus, it can be used as a moisturizing face toner!

Continue!>>>

How Did You Find Your Voice?

$
0
0


When you want what everyone else wants, without discretion, you do what you see everyone else doing. When you believe that what you see, what's presented to you, is all there is, you try to choose a mold to squeeze into, even if it hurts, even if you can't breathe, even if you have to cut off parts of yourself to make it fit.

Read On!>>>
When you've been told, over and over, that you are too much or not enough, it echoes through your actions. Even if you don't consciously accept it, you're sensitive about it, you react to it, and there it has you. Tired from defending yourself, wilted from suppressing yourself, fighting inner and outer battles that will never bring you peace.

When you need someone's permission to feel how you feel, to be different, to be curved and slanted the way you are, you give them your power. You let them shade your light. Parts of you go missing. Gifts go unused. The ache inside of you screams and swells.

When you struggle to appreciate your life because you've lost yourself while living it, you start sliding and feeling unsteady. You're a spectacle, swollen with unsaid words, bleeding from walking on eggshells, crying out with a closed mouth, and no one pauses or notices, so full with their own lives. Looking in the mirror, you struggle to even see yourself.

When you think you're too far gone, living life as someone you don't want to be, seeing no feasible way out, you wonder what would happen if you just let it all go. If you threw up all the words, danced out all the pain, and unleashed all the light. If you stripped yourself down and walked through the streets singing amazing grace and born this way and who you are, who you are, who you are.

When you connect your voice to your survival and to your precious peace of mind, it no longer matters what anyone thinks because you know their approval can't save you. Freedom comes from the expression, not the praise. Courage comes from the choice, not the criticism. It's the doing that matters, the turning around, the falling down, the opening, the crying, the overcoming, for God's sake, the meaning. It's not for the shine or the glory.

When your shame becomes your story, you know you've turned a corner. When you clear your throat and stand on trembling legs and speak your truth, you sleep soundly at night. You look forward to tomorrow, as unruly and uncertain as it may be, and you have hope in what you hope for and you align your steps with your heartbeat, a rhythm that was once muted.

When you see yourself doing things you never thought you could do, becoming someone you only imagined you could be, you recognize yourself and you say there you are, I see you, I will create a beautiful life with you and I love you, regardless.

When you realize that everything you've been, everything you are and everything that you will be is on purpose, you stop apologizing and you start living: the truer, the braver, the better. You let the excess fall away. You know that no mistakes were made in your creation. Every step you've taken has been to get you here, to this moment, to this choice, to this voice that you've had inside of you all along.

How did you find your voice?

Use THIS Oil for Stronger, Longer Natural Hair!

$
0
0

by Emilia Obiekea of AdoreBotanicals.com

Sea Buckthorn oil is highly prized due to its great abilities to grow hair, heal damaged skin and reduce symptoms of skin and hair conditions. This oil is dark and beautifully rich. It contains beta carotene (contributes to its orange-red pigment), tocopherols (vitamin E), essential fatty acids (such as: linoleic, Oleic, Palmitic, Stearic) and phytosterols. Just like coconut oil, it solidifies and liquefies depending on the temperature. It is highly concentrated so a little goes a long way. Never use it straight. Although it is a not an essential oil it is best to treat it as one. Simply diluted in another carrier oil and it is ready to use.

Sea Buckthorn Benefits
Encourages hair growth
Deters split ends
Reduces hair loss
Increases hair elasticity
Moisturizes dry skin
Soothes itchy/ dry scalp
Minimizes inflammation
Damaged hair
Nourishes the hair follicles
Keeps hair frizz free
Wonderful for those that suffer from eczema, rosacea, dermatitis, psoriasis

Read On!>>>
Rich Sea Buckthorn Hair Mask
Useful for all hair types

Ingredients
-2 tablespoons of Daily Dew oil or any carrier oil of choice*
-1 teaspoon of coconut nectar or vegetable glycerin
-1 teaspoon of sea buckthorn seed oil **
-1 cup of full fat greek yogurt
-4 tablespoons of raw aloe gel
-2 tablespoons of rose powder (optional)
-4-6 drops of peppermint essential oil
* Common carrier oils are grapeseed oil, extra virgin olive oil, unrefined coconut oil, etc...
**it is very concentrated that's all it takes

Steps
1. Blend all ingredients together in a bowl.
2. Apply to damp or dry hair from root to ends.
3. It is great for detangling the hair due to it having tons of slip.
4. Wrap hair and leave the mask in without heat for 20-30 mins.
5. Rinse well with lukewarm water.
6. Do final rinse with cool water.

Results
You will notice your hair will feel stronger and softer with each use. It does not need to be used weekly. It is a great biweekly or monthly treat for the hair and scalp.

Give it a try and share your results.
Enjoy!
Viewing all 4836 articles
Browse latest View live


Latest Images